Whip up a batch of homemade cheese and onion scones with our quick and easy recipe. Enjoy as the perfect snack or side dish!

- Cheese and onion scones are a delicious savoury treat that can be enjoyed as a snack or served alongside soup or salad.
- This easy recipe requires cheddar cheese, spring onions, flour, and butter.
- The key to achieving light and fluffy scones is to handle the dough gently and not overwork it.
- These scones can be customized by adding herbs or other flavours to suit your taste.
- They can be stored and reheated quickly, making them convenient for meal prep or on-the-go snacks.
Why You Will Love This Recipe
This recipe is for you if you enjoy comfort foods and the tasty combination of cheese and onions. There’s something incredibly satisfying about sinking your teeth into a warm, fluffy scone with a cheesy, savoury flavour. Whether you’re looking for a delicious snack or a side dish to accompany your meal, these cheese and onion scones are sure to hit the spot.
Scones are a British classic, and for good reason. With their golden brown crust and soft, pillowy interior, they are the epitome of comfort food. While scones are typically associated with sweet flavours like berries or chocolate, these cheese and onion scones bring a savoury twist. They are perfect for those who prefer a more savoury option or want to try something different.
Making scones at home is a rewarding experience. Not only do you get to enjoy the delicious flavours, but you also have the satisfaction of knowing that you made them from scratch. Plus, the smell that fills your kitchen as they bake is gorgeous. So, grab your apron and let’s make some homemade cheese and onion scones!
Why This Recipe Should Be Your Go-To
This cheese and onion scone recipe should be your go-to for several reasons. Firstly, it’s a super easy recipe that can be whipped up quickly. You’ll have delicious scones with just a few simple ingredients and minimal prep work.
Secondly, the scones made from this recipe are incredibly fluffy. Combining the right amount of baking powder and egg and a light touch when handling the dough ensures that each scone is light and airy. The texture is simply irresistible.
Lastly, who can resist the cheesy goodness of a cheese scone? The cheddar cheese adds a rich and savoury flavour that pairs perfectly with the sweetness of the spring onions.
Essential Ingredients for Your Scones
To make these delicious cheese and onion scones, you’ll need a few essential ingredients that you already have in your pantry. The show’s star is cheddar cheese, which adds a rich and savoury flavour to the scones. Plain flour forms the base of the dough, while unsalted butter provides the necessary fat for a tender texture. Baking powder and egg give the scones their rise and fluffiness. With these simple ingredients, you can create a batch of delicious scones that will have everyone asking for more.
Choosing the Right Cheese for Flavorful Scones
Cheddar cheese is the classic choice for cheese and onion scones. Its sharp and tangy flavour pairs perfectly with spring onions. You can use regular cheddar cheese or a more flavorful option like vintage cheddar for an extra kick of flavour.
For the best results, grating the cheese yourself is always recommended rather than using pre-packaged shredded cheese. Freshly grated cheese has a better texture and melts more evenly, resulting in a more delicious final product. So grab your grater and a block of your favourite cheddar cheese, and get ready to add that irresistible cheesy goodness to your scones.
How To Make Cheese and Onion Scones
Mixing the Dry Ingredients
To begin making your cheese and onion scones mix the dry ingredients. Combine the plain flour, baking powder, and a pinch of sea salt in a large bowl.
Plain flour provides the scones with structure and texture. Baking powder gives the scones their rise and fluffiness. A pinch of sea salt enhances the flavours and balances the sweetness of the caramelized onions and cheese.
Give the dry ingredients a good whisk or a gentle mix with a spoon to ensure they are well combined. This will ensure that each scone has an even distribution of the ingredients and that the baking powder is evenly distributed throughout the dough. Once the dry ingredients are mixed, it’s time to move on to the next step of the recipe.
Incorporating the Butter
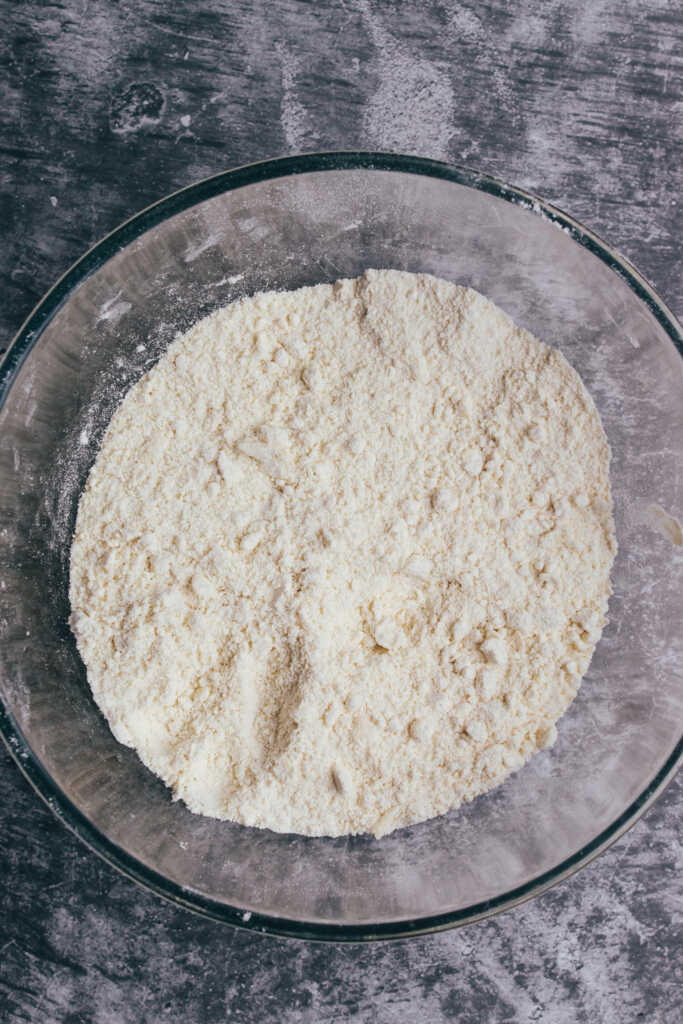
The next step is to work the butter into the flour. The idea here is to get a nice, even bowl of breadcrumbs with no large lumps of butter—a bit like making a crumble. I like to use a pastry cutter, but you can use your hands. Rub the butter into the flour until you get a fine breadcrumb-like mixture.
Incorporating the Cheese and Onion
Once the dry ingredients are combined, it’s time to incorporate the cheese and onion. Add the grated cheddar cheese and spring onions to a large bowl. Gently stir to distribute them evenly throughout the mixture.
The cheese adds a rich and savoury flavour to the scones, while the onions bring a sweetness and depth of flavour. The combination of these two ingredients is what makes these scones truly irresistible.
Ensure the cheese and onions are evenly distributed throughout the mixture so that each scone has a delicious burst of flavour in every bite.
Adding Milk and Egg
The next step is to bind all the dry ingredients with milk and egg. You can crack the egg into the bowl and add most of the milk. You might not need all of it, so it’s a good idea to always keep some back, as everyone’s flour is different. I like to get my hands in and then mix it all together until a dough starts to form. The dough should be sticky, so don’t worry!


Kneading and Shaping Your Scones
It’s time to knead and shape the scones. Start by transferring the dough onto a floured surface. This will prevent the dough from sticking and make it easier to work with. Gently work the dough to make it cohesive.
Gently pat the dough into a round disc or square about 3.5 cm thick. You can use a rolling pin if you prefer. The key is to handle the dough gently and avoid overworking it, as this can result in dense scones.
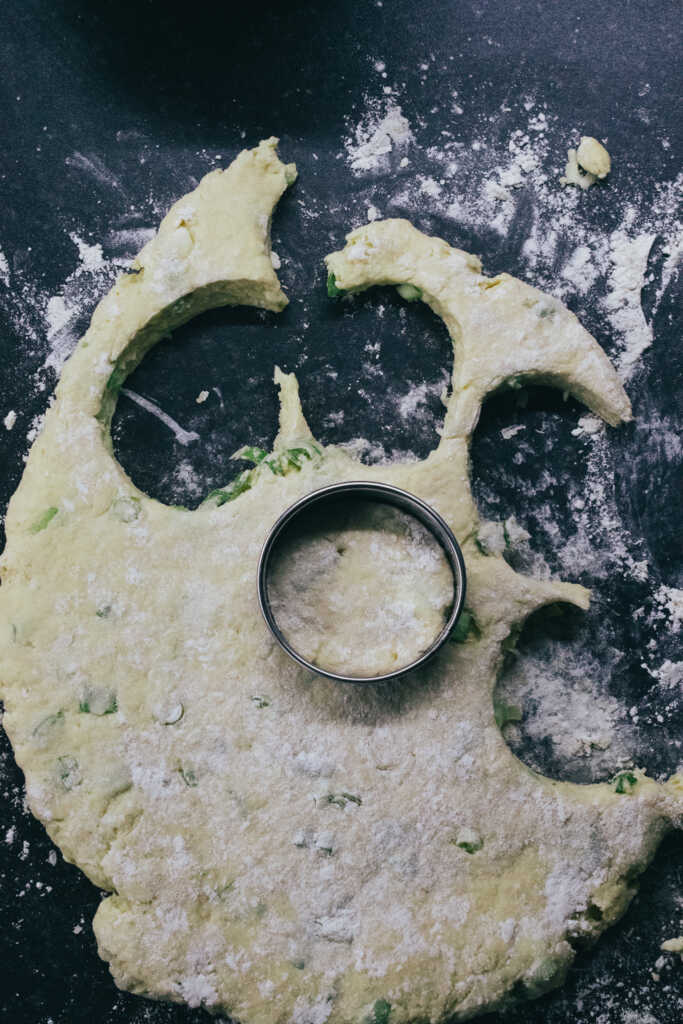
Once the dough is shaped, use a sharp knife or a scone cutter to cut out individual scones. If using a knife, dip it in flour to prevent sticking. Aim for scones that are about 6 cm in diameter. Place the scones onto a baking tray, leaving enough space between them to expand as they bake. Gently eggwash the top of the scones before baking. Be careful not to eggwash the sides, as this can effectively ‘seal’ them and stop them from rising.
Baking to Perfection: Time and Temperature Tips
Now that your cheese and onion scones are shaped and ready to go, it’s time to bake them to perfection. Preheat your oven to 200°C and line a baking sheet with parchment paper.
Place the scones onto the baking sheet, leaving enough space between them to expand as they bake. This will ensure that they bake evenly and have room to rise.
Bake the scones in the hot oven for 15-20 minutes or until golden brown. Every oven is different, so keep an eye on them and adjust the baking time as needed.
Once the scones are golden brown and cooked, remove them from the oven and transfer them to a wire rack to cool. This will help them cool evenly and avoid any sogginess on the bottom.

Customizing Your Scones
One of the great things about cheese and onion scones is that you can easily customize them to suit your taste. Here are a few variations and ideas to add extra flavour to your scones:
- Add herbs like chives, thyme, or rosemary to the dough for an extra burst of freshness.
- Swap out the cheddar cheese for a different type of cheese, like feta or Gruyere, for a unique flavour profile.
- Add a sprinkle of cayenne pepper or paprika to give your scones a hint of heat.
- Mix in some freshly ground black pepper for a little extra kick.
- Use spring onions for a fresher flavour.
Feel free to get creative and experiment with different flavours to make these scones your own. The possibilities are endless!
Adding Herbs for Extra Flavor
Adding herbs to your cheese and onion scones is a great way to enhance their flavour and make them even more delicious. Here are a few herbs that work well in these scones:
- Chives: Finely chopped chives add a fresh and mild onion flavour to the scones.
- Thyme: Sprinkle some dried or fresh thyme into the dough for a savoury and earthy taste.
- Rosemary: Fresh rosemary leaves, finely chopped, add a fragrant and aromatic flavour to the scones.
- Black Pepper: A sprinkle of freshly ground black pepper adds a subtle heat and depth of flavour to the scones.
Serving Ideas for Breakfast, Lunch, or Dinner
Cheese and onion scones can be served in various ways, making them a versatile breakfast, lunch, or dinner option. Here are a few serving ideas to inspire you:
- Breakfast: Serve warm scones with butter or your favourite spread alongside a cup of tea or coffee for a delicious start to the day.
- Lunch: Pair the scones with a bowl of soup or a crisp salad for a satisfying lunchtime meal.
- Dinner: Serve the scones as a side dish with roasted meat or grilled vegetables for a flavorful dinner.
- Snack: Enjoy a scone as a tasty snack between meals. They are great for picnics or packed lunches, too.
Storing and Reheating Tips
If you have any leftovers or want to make a batch of scones ahead of time, it’s essential to know how to store and reheat them properly. Here are a few tips:
- Storing: Let the scones cool completely and then store them in an airtight container at room temperature for up to 2 days. For extended storage, you can freeze them in a freezer-safe bag or container for up to 3 months.
- Reheating: Place the scones in a preheated oven at 150°C (300°F) for about 10 minutes until they are warmed through. Alternatively, microwave them for a few seconds to remove the chill.
How to Keep Your Scones Fresh
To keep your cheese and onion scones fresh for longer, storing them properly is essential. Here are a few tips:
- Let the scones cool completely before storing them. This will prevent moisture build-up and keep them from becoming soggy.
- Store the scones in an airtight container or wrap them tightly in plastic to keep them fresh.
- If you’re not planning on eating them within a day or two, you can freeze the scones. Wrap them individually in parchment paper or in a freezer-safe bag or container. They can be frozen for up to 3 months.
- When ready to enjoy the scones, thaw them at room temperature or reheat them in the oven or microwave.
Reheating Without Losing Moisture or Texture
When reheating your cheese and onion scones, preserving their moisture and texture is important. Here are a few tips to ensure that your scones taste just as delicious as when they were freshly baked:
- If you have frozen scones, let them thaw at room temperature before reheating. This will help them retain their moisture.
- To reheat the scones, place them in a preheated oven at 150°C (300°F) for about 10 minutes until warm. This gentle heat will help the scones retain their moisture and prevent them from becoming dry.
- Alternatively, you can reheat the scones in the microwave for a few seconds. Be careful not to overheat them; the microwave can quickly dry out the scones.
- To add moisture to the scones, brush them with melted butter or milk before reheating.
Troubleshooting Common Issues
While making cheese and onion scones is relatively straightforward, a few common issues can arise. Here are some troubleshooting tips to help you overcome these problems:
Preventing Your Scones from Becoming Too Dense
If your scones turn out too dense, possible causes and solutions exist. Here’s how to prevent your scones from becoming too dense:
- Be careful not to overmix the dough. Mix the ingredients until just combined to avoid developing too much gluten, which can result in a dense texture.
- Ensure that your dough has the correct moisture content. If the dough feels too dry, add more liquid; if it feels too wet, add more flour.
- Make sure your baking powder is fresh and active. Old or expired baking powder may not provide the necessary lift and result in dense scones.
Ensuring Even Baking and Perfect Rise
To ensure that your cheese and onion scones bake evenly and rise beautifully, here are a few tips:
- Use an oven thermometer to ensure your oven is at the correct temperature. Oven temperatures can vary, and an accurate temperature is essential for even baking.
- Ensure your scones are evenly sized and spaced on the baking sheet. This allows for even heat distribution and helps the scones rise correctly.
- Avoid opening the oven door too frequently while the scones are baking, as this can cause temperature fluctuations and affect the scones’ rise.

Frequently Asked Questions
Can I Make These Scones Vegan?
Yes, you can make these scones vegan using dairy-free butter and cheese alternatives. Replace the butter with vegan margarine or coconut oil, and use vegan cheese or nutritional yeast for a cheesy flavour. Substitute the milk with non-dairy milk like almond milk or soy milk.
How Long Do Cheese and Onion Scones Last?
Cheese and onion scones will stay fresh for up to 2 days when stored in an airtight container at room temperature. If you want to keep them longer, you can freeze them for up to 3 months. Wrap them tightly in parchment paper or a freezer-safe bag or container before freezing.
Try Another Recipe
Cheese and Onion Scones
Equipment
- 1 Rolling Pin
- 1 mixing bowl
- measuring spoons
- 1 scone cutter
- 1 baking tray
- digital scales
- 1 box grater
Ingredients
- 450 g plain flour
- 4 tsp baking powder
- 120 g salted butter
- 260 g sharp cheddar (plus a little extra for topping the scones)
- 200 ml whole milk
- 2 large eggs
- 6 spring onions
Instructions
- Begin by stirring the flour and baking powder to fully incorporate
- Grate your cheese using a box grater and set aside
- Slice your spring onions and set aside
- Work the butter into the flour with your fingers until it resembles fine breadcrumbs – try to ensure there are no lumps of butter
- Once the butter is worked in, add the cheddar cheese and spring onions and stir to combine through the flour
- Add the milk and the egg, reserving a touch of the milk in case the mixture gets too dry
- Gently work the dough with your hands until it becomes more cohesive, then tip out onto a well floured work surface
- Gently work with your hands until the dough comes together, be careful not to overwork or the scones will become tough
- roll out the dough to about an inch thick
- cut out scones using a scone cutter by pressing down firmly. Don't twist the cutter as this can prevent the scones rising properly
- Place scones on a baking tray and brush the tops with eggwash and top with some grated cheese
- Bake in a preheated oven at 200℃ for between 15 and 20 minutes until golden
- Allow to cool on a cooling rack then enjoy!

Hi, I’m Paul! I’m a passionate home chef, recipe developer, and food lover who believes that cooking should be fun, rewarding, and stress-free! Through Scoffs & Feasts, I share my favorite tried-and-tested recipes, cooking tips, and troubleshooting advice to help home cooks gain confidence in the kitchen. Whether you’re a beginner or an experienced foodie, I hope my recipes inspire you to try something new.

