
The first time I made crème brûlée, I was convinced I’d either burn the sugar or end up with scrambled eggs instead of silky custard. But after testing (and eating!) my way through multiple batches, I discovered the secrets to making perfect crème brûlée at home—even with a fun blueberry twist!
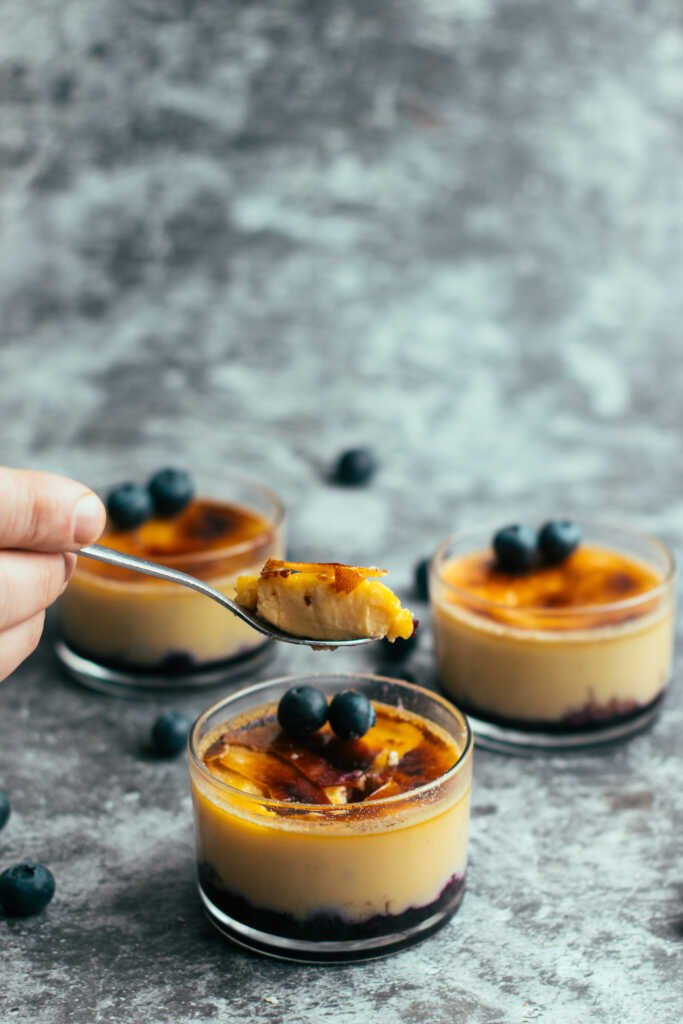
This Blueberry Crème Brûlée recipe combines the rich, creamy texture of classic crème brûlée with the fruity brightness of blueberries and a hint of orange zest. The best part? You don’t need to be a pastry chef to master this French dessert. With my step-by-step guide, including foolproof tips and an easy no-blowtorch method, you’ll be cracking into your own homemade brûlée in no time!
Ready to impress your guests—or just treat yourself? Let’s get started!
Love blueberry desserts? You might also enjoy my Homemade White Chocolate and Blueberry Muffins or Best Apple Crumble and Custard. Find more ideas in my Easy Dessert Recipes collection
💡 Quick Tips for Perfect Blueberry Crème Brûlée
For those in a rush, here are some key tips before you dive into the full recipe:
Use a fine-mesh strainer – This helps remove any lumps and makes for an ultra-smooth custard.
Temper your egg yolks slowly – Pour the hot cream in gradually while whisking to prevent scrambling your eggs.
Water bath (bain-marie) is essential – It creates a gentle, even heat for the custard to set perfectly.
Caramelize the sugar right before serving – If you do it too early, the sugar will soften and lose its crunch.
Chill for at least 4 hours (or overnight) – This allows the flavours to develop and the custard to set properly.
No torch? No problem! – Use your oven’s broiler to caramelize the sugar – just keep an eye on it!
Why You’ll Love This Recipe
Customizable with different fruits and flavors.
No special skills required—perfect for beginners!
Uses simple ingredients you probably already have.
What is Crème Brûlée? (A Brief History)
Several countries claim to have invented creme brulee:
- France – thought to have originated here as the term creme brulee translates to burnt cream and it first appeared in an ancient French cookbook in 1691.
- England—Some argue that England is the birthplace of Creme Brulee. It was served at Trinity College and known as Trinity Cream in the 17th Century.
- Spain – Creme Catalana has the addition of citrus to the custard and is believed to predate Creme Brulee.
Key Components Of Blueberry Creme Brulee
- Blueberry base or sauce – the blueberry sauce I have made with frozen blueberries but you can also make it with fresh blueberries or even use blueberry jam in a pinch.
- Creamy custard infused with vanilla – I have used double cream for the custard for extra richness and creaminess
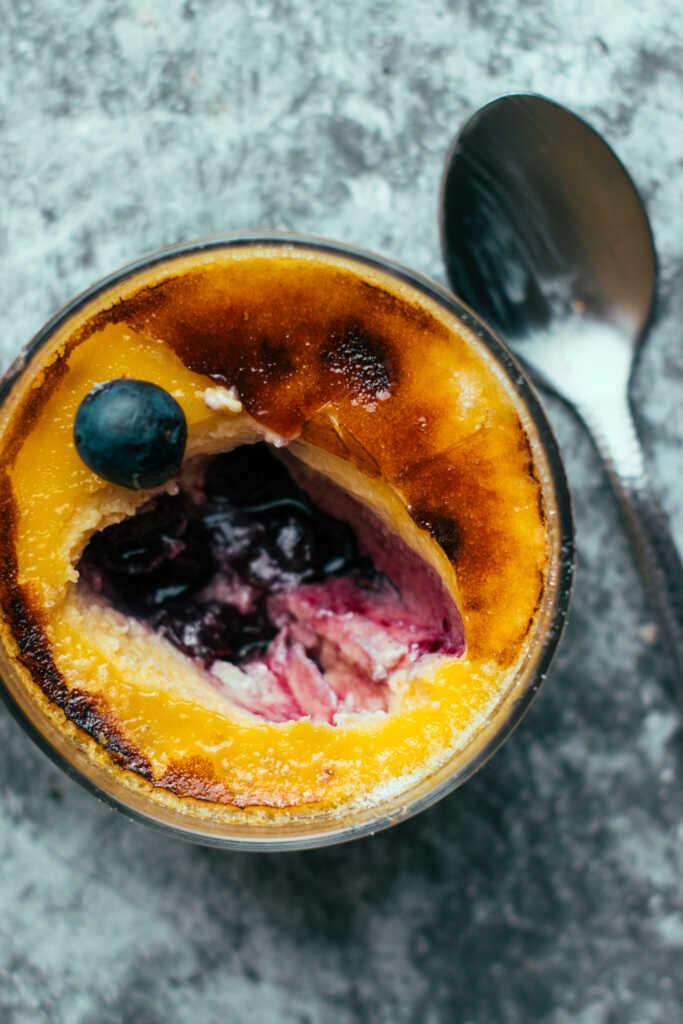
- Caramelized sugar topping – a golden crunchy caramelized sugar top finishes off this dessert with a contrast against the creamy custard
Flavour Profile of Blueberry Creme Brulee
- Balance of sweet and tart flavours
- Contrast between creamy custard and crunchy caramel
- Burst of blueberry in every bite
Ingredients You’ll Need
For The Blueberry Base
- Fresh or frozen blueberries – you can use fresh or frozen berries. I tend to use frozen as they are just as good as you are cooking them down into a jam anyway. I always have frozen blueberries but don’t always have fresh blueberries.
- Sugar – used to sweeten the blueberry base. You could also use brown sugar for a deeper flavour but I use caster sugar throughout this recipe
- Orange zest – the addition of orange zest wakes up the blueberries and is a lovely flavour combo. You could also use orange extract or experiment with a liqueur like triple sec.
For The Custard
- Heavy cream – to make a luscious creamy rich custard. You can also use a combination of cream and milk but opt for full fat for maximum flavour.
- Egg yolks – these provide the base for the custard
- Vanilla extract or vanilla bean – I have used both depending on what I have in my cupboards at the time. For an extra special touch try using a vanilla bean, I have found that it gives the custard a much richer flavour.
- Caster Sugar – I like to use caster sugar in this recipe as I am using it for the caramelized topping and it dissolves easily when whisked with the egg yolks.
The Caramelized Topping
- Caster Sugar – caster sugar is the best choice for creating an evenly caramelized crust as it is super fine and caramelizes easier than granulated sugar.
- Fresh Blueberries – as an optional garnish you can add some fresh blueberries to the top of the crust.
If you love classic French desserts, check out my Traditional Crème Brûlée.
Equipment
- Ramekins or crème brûlée dishes (I use 3-inch diameter ramekins)
- Large baking dish/roasting dish for the water bath
- Medium Saucepan for custard preparation and small saucepan for making the blueberry base
- Mixing bowls
- Whisk
- Fine-mesh strainer
- Kitchen torch or broiler/grill
- Measuring Jug
How to Make Blueberry Crème Brûlée (Step-by-Step)
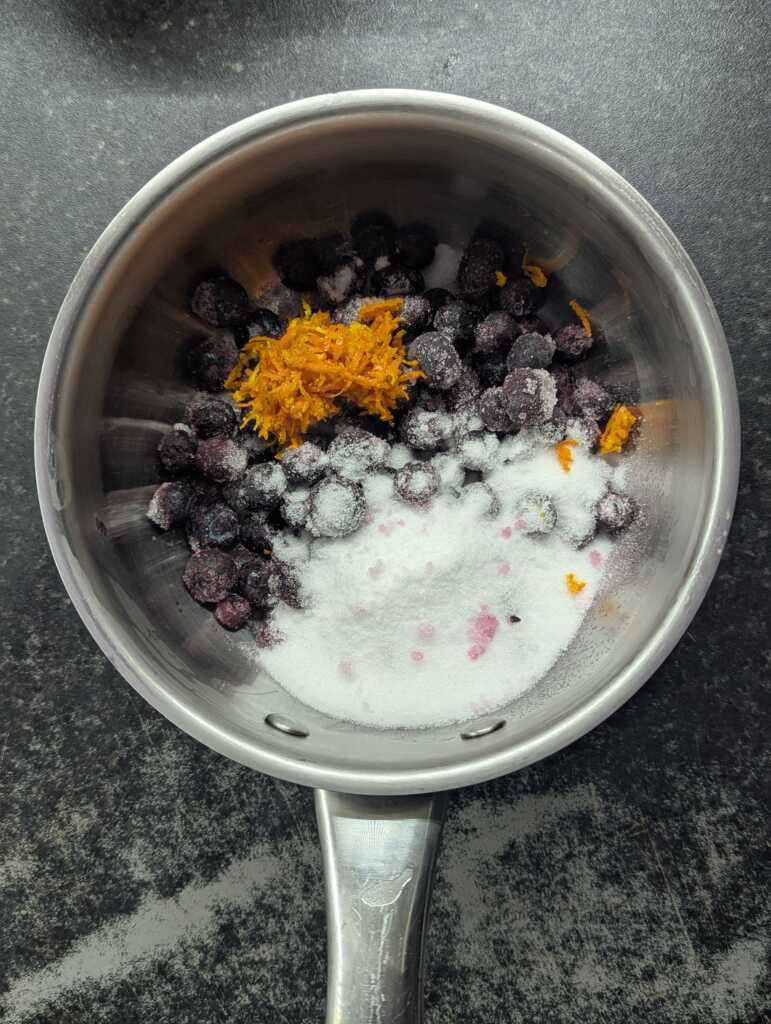
Step 1 – Prepare the Blueberry Base
- To make the blueberry base, all you need is frozen/fresh blueberries, sugar and the zest of an orange.
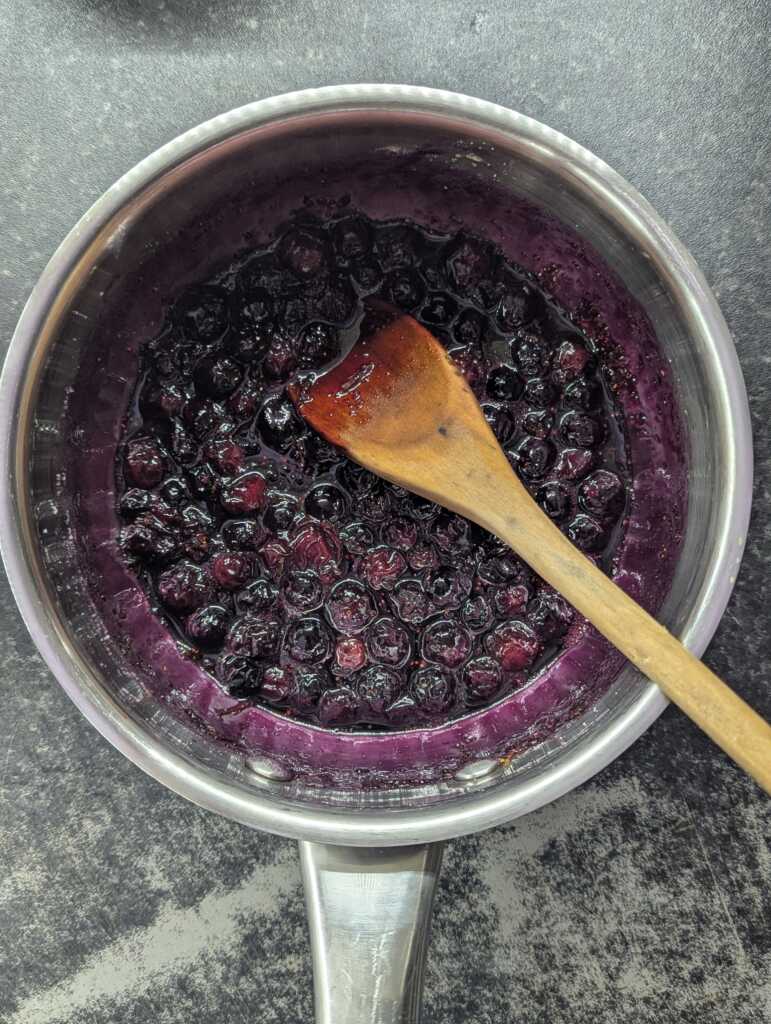
- Reduce to a syrupy consistency.
- Cook the blueberries over medium heat until the sugar dissolves and the blueberries break down. The mixture should thicken and become syrupy. This should take around 7-8 minutes or so.
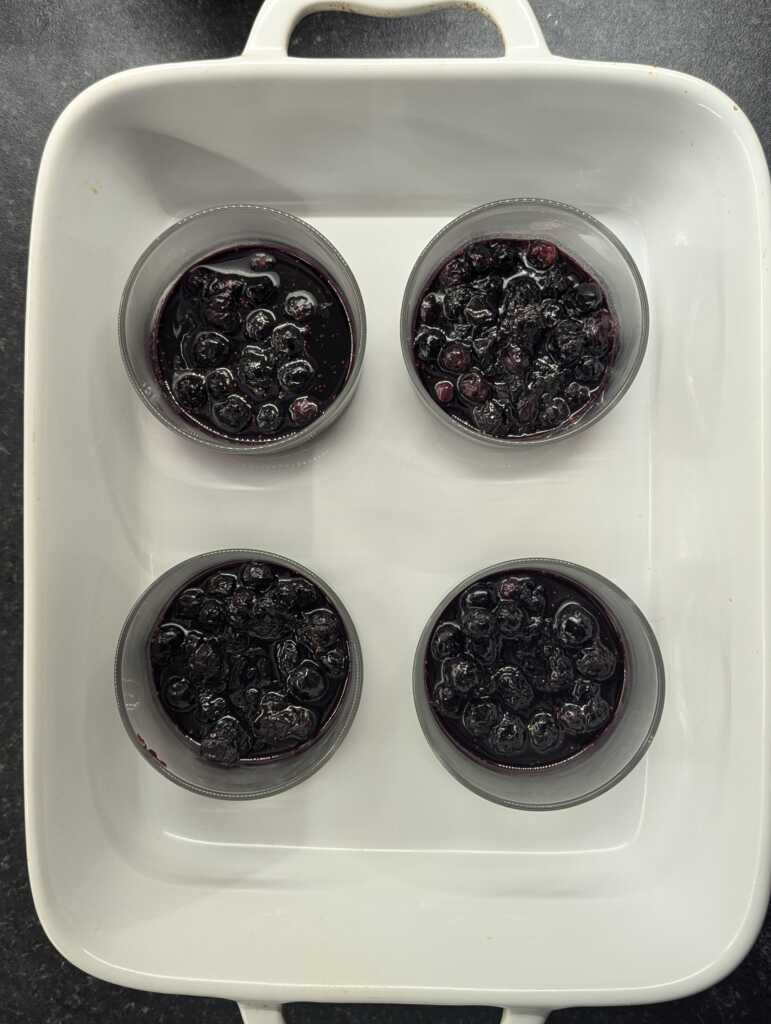
- Cooling and distributing in ramekins
- The next step is to allow the jam to cool then line the bottom of your ramekins with a big spoonful of the jam.
Step 2 – Make the Custard
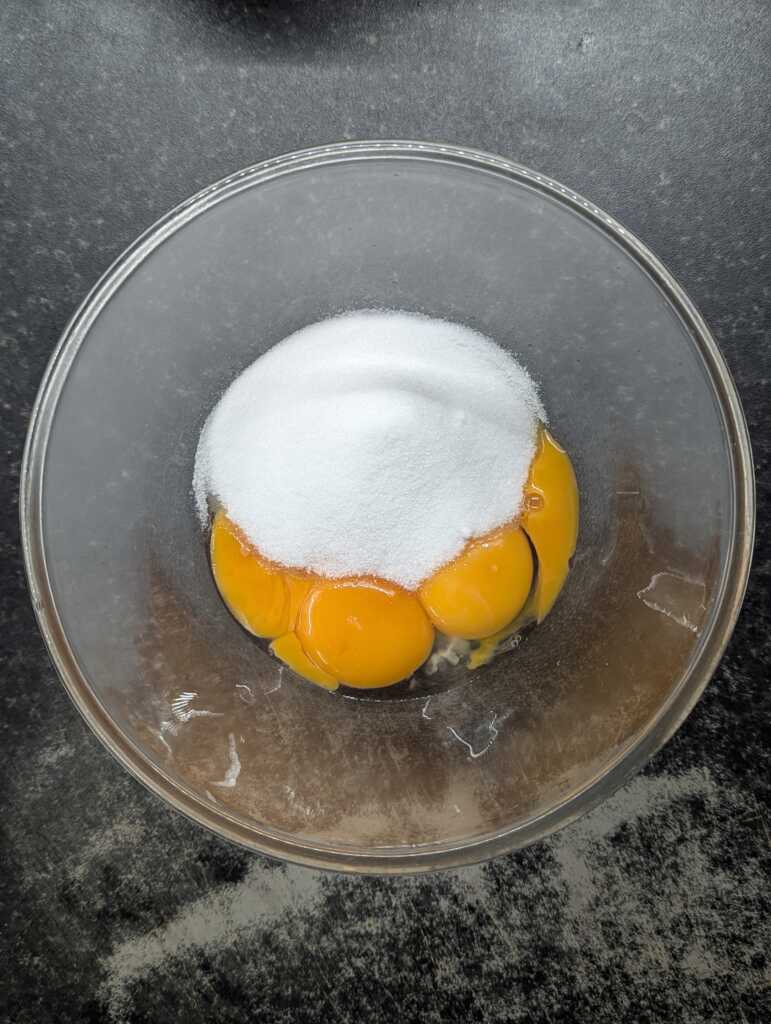
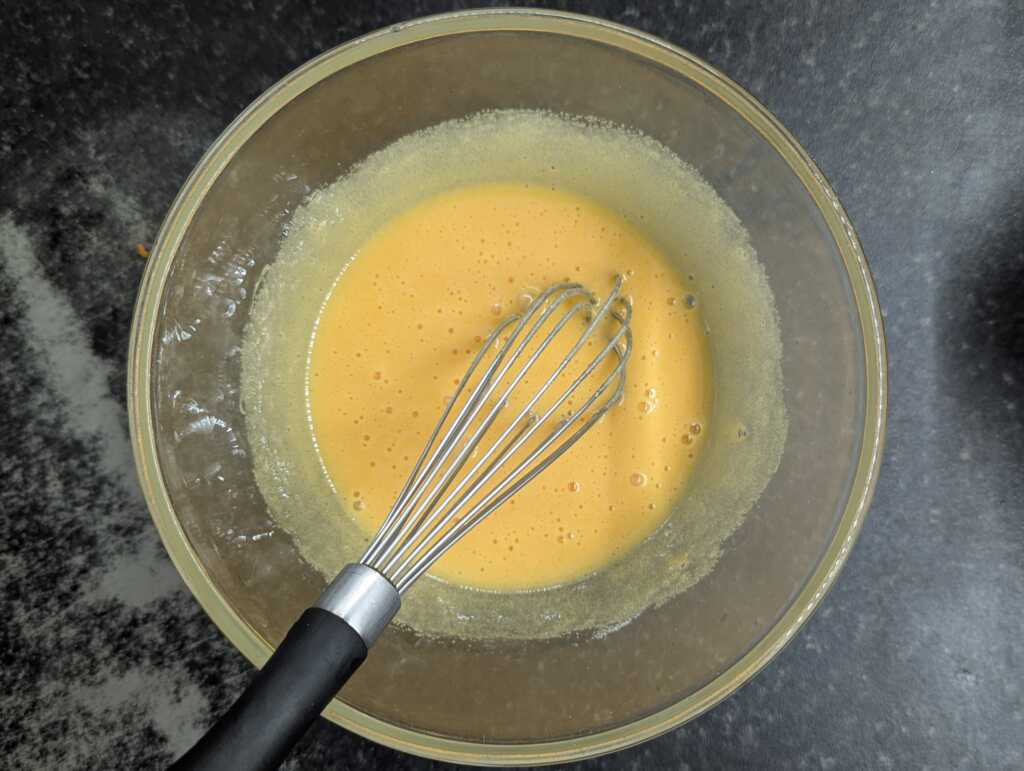
If you haven’t made custard before it is straightforward. The first step is to whisk the egg yolks with the sugar in a medium bowl until pale. This should only take a couple of minutes.
Next step is to heat the heavy whipping cream. If you are using a vanilla pod, add it here to infuse the cream with a vanilla flavour. You don’t need to bring the cream to a boil, just once it starts to bubble around the edges, then remove it from the heat. If using vanilla extract I add it at the next step.
Tempering egg yolks – to temper the egg yolks, take the hot cream mixture and add a little to the egg mixture whilst whisking, then slowly pour in the rest of the hot cream whilst still whisking. Add the vanilla extract.
Straining the mixture for smoothness – this is an optional step, you can pass the custard mixture through a fine mesh sieve to ensure you catch any lumps and end up with a super smooth custard. Pour the custard into the ramekins over the blueberries and they are ready to go in the water bath.
Step 3 – Bake Using a Water Bath
- Set up the hot water bath – Use a large deep baking dish, like the kind used for a pasta bake or lasagna. Ensure it’s deep enough to fit the ramekins and allows room for water.
- Boil the kettle. Use the water off the boil to fill the baking dish until the water reaches halfway up the sides of the ramekins.
- Oven temp – the custards are now placed into a preheated oven at 160 for about 35-40 minutes. Ensure you have preheated your oven at least 10 minutes before you places the custards in. Position in the middle of the oven for even heating.
- Signs of doneness – after the 30-35 minute mark I like to check my puddings regularly so I can get them out of the oven and they can cool. I like to look for the custard to be set but with a slight jiggle in the middle. Remember they will carry on cooking and setting up as they cool.
Step 4 – Chill & Set the Custard
- Cool at room temperature – this serves a few purposes. It allows for even cooling and maintains the texture of the custard. If you put the puddings in the fridge immediately, the custard can crack and condensation can develop due to the change in temperature.
- Setting Time – the custard will be at its best if allowed to rest and set for maximum time. I like to leave the custards overnight in the fridge to allow the flavours to develop but you can chill them adequately in around 4 hours. This step can’t be skipped as it allows the custard to firm up and keep its shape, so you can then caramelize the top with the sugar.
Step 5 – Caramelize the Sugar Topping
A perfect crème brûlée has a lovely crisp, caramelized sugar topping. Here’s how to get it just right:
Using a Kitchen Torch (Recommended Method):
- Sprinkle caster sugar over the top of each custard – I use around a teaspoon per pudding. Try to get the layer of sugar nice and even or smooth it out with the back of a spoon.
- Position the torch about 2-3 inches from the sugar and move it in a circular motion over the sugar surface – this takes practice to get right.
- Continue until the sugar melts and turns a deep amber colour, adjusting the distance you hold the torch if you need to.
- Let the caramel cool and harden for about 2 minutes before serving.
Using the Oven Broiler (Alternative Method):
- Sprinkle the custard with sugar then place on a baking tray
- Position the baking tray about 4 inches below the grill
- Grill for 3-5 minutes, keeping an eye on the custards to prevent burning
- You can rotate the baking tray to ensure you get an even caramelization on the puddings.
- Allow the sugar to cool and harden before serving.
Tip: For best results, caramelize the sugar just before serving. This allows the sugar to stay crisp and the custard remains chilled.
Tips For Perfect Creme Brulee
Achieving The Perfect Custard
To achieve the perfect custard, use these tips for guidance:
- Temperature Control – cook the custard over medium heat just until it starts to bubble at the edges, this ensures the custard doesn’t get too hot and curdles before you bake them.
- Ensure smooth tops before baking – its important to get the top of the custards nice and smooth before baking so that when they are cooked the sugar layer caramelizes nice and evenly. To do this, try pouring the custard through a fine mesh sieve into the ramekins to remove any air bubbles or foam. You can also try removing any bubbles once the custard is in the ramekins by using the back of a teaspoon dipped in warm water. My favourite technique is to gently run the blow torch over the custard once or twice to get the little bubbles to disappear.
- Use High-Quality Ingredients: Fresh cream, real vanilla beans, and high-quality eggs make a noticeable difference in both taste and texture
- Tempering Egg Yolks: Gradually add hot cream to egg yolks while whisking to prevent curdling.
Master The Caramel Layer
- Choose the right sugar – to ensure even caramelization, you need to use caster sugar as it is superfine and caramelizes easily as it melts quicker. Granulated sugar can be used but this requires going easy with the blow torch and holding it further away with less heat intensity to allow the sugar to melt and not burn.
- Ideal Thickness – getting the thickness of the sugar layer can be tricky but I find the best way is to just sprinkle the sugar on evenly with your fingertips, then tap off any excess. This way you get an even layer. If you add too much sugar then the layer gets thicker and can get too hard!
- Timing – its important to caramelize the sugar just before serving. It will take the caramel a couple of minutes to cool but if you do it ahead of time, the layer goes soggy and sticky and loses its crispness.
- Caramelizing the sugar – using a kitchen blowtorch is preferred as it creates the caramel layer without heating up the custard and turning it runny underneath.
Blueberry Crème Brûlée Variations
- Raspberry Crème Brûlée: Substitute raspberries for blueberries in the base for a tart twist.
- Peach Melba Crème Brûlée: Layer peach compote and raspberries at the bottom for a peachy keen dessert.
- Mixed Berry Crème Brûlée: Use a combination of strawberries, blueberries, and blackberries for a berry medley
- Maple Blueberry: Replace some of the sugar with maple syrup for a Canadian-inspired dessert.
- Coconut Blueberry: Use coconut cream in place of some of the heavy cream for a tropical touch.
- Dairy-Free: Substitute full-fat coconut milk for the cream and milk. The texture may be slightly different, but still delicious.
- Sugar-Free: Use a sugar substitute like erythritol or allulose in the custard. For the brûlée top, a small amount of real sugar is best for caramelization.
- Gluten-Free: Good news! This recipe is naturally gluten-free. Just ensure all your ingredients are certified gluten-free if you’re highly sensitive.
- Remember, when making substitutions, you may need to adjust cooking times or temperatures slightly. Always keep an eye on your dessert as it bakes and be willing to experiment to find your perfect variation!
Troubleshooting & Common Mistakes
Why is my custard runny?
Runny Custard: Ensure the custard is baked in a water bath to regulate temperature and prevent overcooking. Ensure the cuatrd chills for plenty time in the fridge, at least 4 hours.
How do I get an even caramelized sugar crust?
Uneven Caramelization: Hold the kitchen torch about 2-3 inches from the sugar and move it in a circular motion for even browning.
Why does my custard keep cracking?
Cracks in custard: you may have overcooked the custard or not let it cool completely before putting it in the fridge.
FAQ’s
Yes! You can prepare and chill the custards up to two days in advance. Just caramelize the sugar topping right before serving for the best texture.
It may need more baking time or longer chilling. If your oven runs cool, bake for an extra 5-10 minutes.
Use superfine caster sugar for even melting. Hold the blowtorch 2-3 inches away and move in circular motions.
If using the oven broiler, watch closely to avoid burning.
Absolutely! Fresh blueberries work just as well. You may need to cook them down slightly longer since they have less moisture than frozen ones.
Yes! This crème brûlée recipe is naturally gluten-free. Ensure your ingredients (like vanilla extract) are labelled gluten-free if you’re highly sensitive.
Yes! Substitute full-fat coconut milk for the heavy cream. The texture may be slightly different, but it will still be delicious
More Dessert Recipes to Try
Tried This Recipe? Leave a Review & Tag Me!
Looking for more easy custard recipes? Try Apple Crumble & Custard!
Pro Tips for a Perfect Blueberry Crème Brûlée
🟢 Use a Vanilla Bean for Extra Flavor: If you want a deeper vanilla flavor, split a vanilla bean and let it steep in the cream overnight before making the custard. It makes a noticeable difference!
🟢 Strain for the Silkiest Custard: After mixing your custard, pass it through a fine-mesh sieve before pouring it into ramekins. This removes any egg solids and ensures a smooth texture.
🟢 The Secret to an Even Sugar Crust: For the best caramelized topping, use superfine caster sugar. It melts more evenly than granulated sugar, preventing burnt spots. If you only have regular sugar, pulse it in a food processor for a few seconds.
🟢 No Blowtorch? No Problem! Use your oven’s broiler (grill setting) to caramelize the sugar. Just keep a close eye on it and rotate the ramekins for even browning.
🟢 How to Know When It’s Done: Your custard should have a gentle jiggle in the center when you remove it from the oven. It will continue setting as it cools!
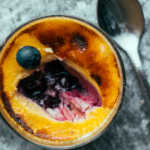
Easy Blueberry Crème Brûlée Recipe – A Step-by-Step Guide
Equipment
- Ramekins or crème brûlée dishes (I use 3-inch diameter ramekins)
- Large baking dish/roasting dish for the water bath
- Medium Saucepan for custard preparation and small saucepan for making the blueberry base
- mixing bowls
- whisk
- Fine-mesh strainer
- Kitchen torch or broiler/grill
- measuring jug
Ingredients
- For the Blueberry Base:
- 8 tbsp frozen or fresh blueberries
- 4 tbsp sugar
- Zest of 1 orange
- For the Custard:
- 300 ml heavy cream double cream
- 1 tsp vanilla extract or ½ vanilla bean
- 4 egg yolks
- 4 tbsp sugar
- For the Caramelized Sugar Topping:
- 4 tsp caster sugar or granulated sugar pulsed in a blender
Instructions
- Prepare the Blueberry Base:
- Add blueberries, sugar, and orange zest to a saucepan.
- Cook over medium heat until the blueberries break down and thicken (about 7 minutes).
- Let the mixture cool, then divide evenly among ramekins.
- Make the Custard:
- In a bowl, whisk the egg yolks and sugar until pale and creamy.
- In a saucepan, heat the heavy cream and vanilla over medium heat until it just starts to bubble at the edges.
- Slowly pour the warm cream into the egg mixture, whisking constantly to prevent scrambling.
- Optional: Strain the custard through a fine-mesh sieve for extra smoothness.
- Pour the custard over the blueberry layer in the ramekins.
- Bake Using a Water Bath:
- Place ramekins in a deep baking dish. Pour hot water into the dish until it reaches halfway up the ramekins.
- Bake at 160°C (320°F) for 35-40 minutes, until the custard is just set with a slight jiggle in the center.
- Cool at room temperature, then refrigerate for at least 4 hours (or overnight).
- Caramelize the Sugar Topping (Torch or Broiler Method):
- Sprinkle 1 tsp caster sugar over each custard.
- Torch Method: Use a kitchen torch to melt and caramelize the sugar until golden brown.
- Oven Broiler Method: Place ramekins under the broiler for 3-5 minutes, rotating as needed for even caramelization.
- Let the caramel cool and harden for 2 minutes before serving.
Storage & Make-Ahead Tips
Make-Ahead: You can prepare the custards up to 2 days in advance. Just caramelize the sugar right before serving.
Storage: Store in the fridge for up to 2 days without caramelizing the sugar. Once the sugar is brûléed, serve immediately for the best texture.
Can You Freeze It? Freezing is not recommended, as it changes the custard’s texture.
Refrigeration: Store uncaramelized custards in the fridge for up to 2 days, tightly covered with plastic wrap to prevent absorbing odors.
Caramelization Timing: Brûlée the sugar only before serving, as it softens over time.
Leftovers: If you’ve already brûléed the top, enjoy within a few hours for the best crunch!
Tried This Recipe? Let’s Chat!
Did you love this Blueberry Crème Brûlée? Drop a comment below with your feedback, tips, or favorite variations! If you share it on Instagram, tag @scoffsandfeasts—I’d love to see your creations!

Hi, I’m Paul! I’m a passionate home chef, recipe developer, and food lover who believes that cooking should be fun, rewarding, and stress-free! Through Scoffs & Feasts, I share my favorite tried-and-tested recipes, cooking tips, and troubleshooting advice to help home cooks gain confidence in the kitchen. Whether you’re a beginner or an experienced foodie, I hope my recipes inspire you to try something new.