
Updated on 11 August 2025: new tips, variations, troubleshooting and storage added
Contents
Disclosure: This post contains affiliate links, which means I may earn a small commission if you make a purchase through them—at no extra cost to you. I only recommend products and tools I genuinely use, trust, or believe will add value to your cooking journey. Thanks for supporting the blog!
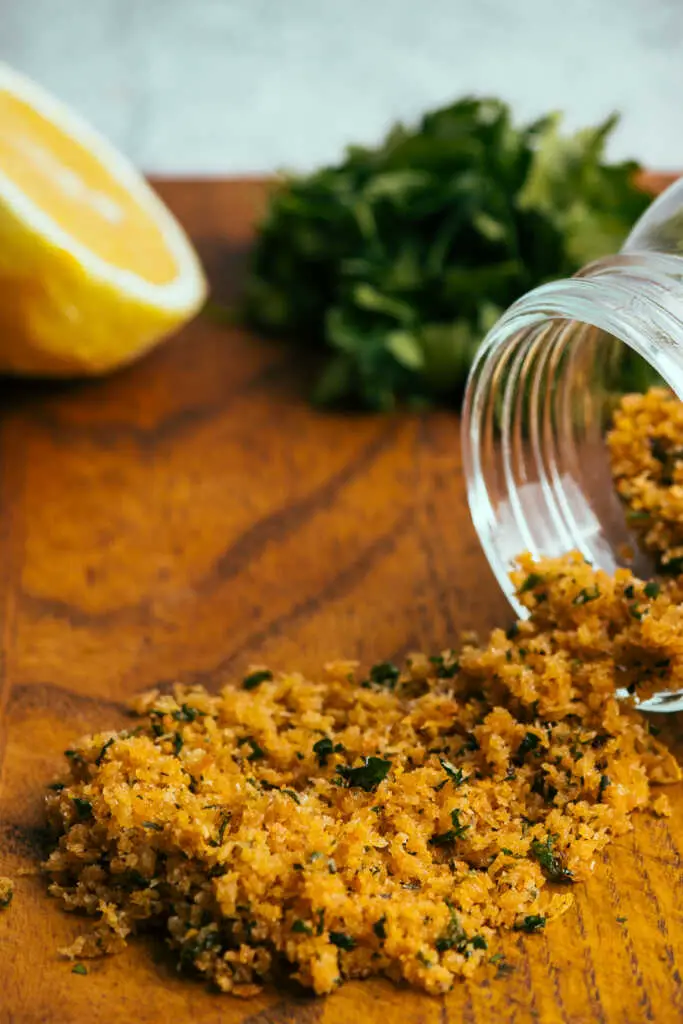
Meet your new secret finishing touch: pangrattato, Italy’s crunchy garlic breadcrumbs. Ready in 5 minutes, it turns simple pasta, soups and salads into something special. Below I’ll show you the classic version I use in my kitchen, quick variations (chilli, lemon, herb), and fixes if it ever goes soggy.
From My Kitchen
Pangrattato is a simple Italian breadcrumb topping that takes pasta to the next level. If you’re looking for pasta inspiration, check out my Easy Pasta Recipes collection. I started making pangrattato as a way to use large amounts of panko I had lying around (I buy in bulk!), and now I make it intentionally. It’s the kind of topping that transforms a simple pasta or salad into something with crunch, flavour, and personality. Over time, I’ve learned exactly how to get the crumbs golden without burning the garlic, and I always keep a jar in the cupboard for quick weeknight upgrades.
What Is Pangrattato? (pan‑graht‑TAH‑toh)
Pangrattato (pronounced pan-grat-TAH-to) is the Italian word for breadcrumbs – but these aren’t just normal breadcrumbs. In Italian cooking, pangrattato usually refers to breadcrumbs that have been gently toasted in olive oil until golden and crisp and flavoured with herbs.
Known as the “poor man’s Parmesan”, pangrattato was born out of cucina povera – the tradition of creating flavourful dishes with simple, inexpensive ingredients. Instead of expensive cheese, cooks would sprinkle these savoury, crunchy crumbs over pasta, soups, and vegetables for texture and taste.
A Little Culinary History
Pangrattato is deeply rooted in Southern Italian home cooking, especially in regions where cheese was a luxury. Families would use leftover stale bread, making sure nothing went to waste. By frying it with olive oil and seasonings, they created a flavourful, satisfying topping that could transform a humble dish into something special.
Today, pangrattato is used in kitchens worldwide – not just for its thriftiness, but for the way it adds crunch and depth to everything from pasta to roasted vegetables.
The Science Behind the Crunch
Oil Infusion & Flavour Boost
Each crumb soaks up just enough fat to carry and release those new Maillard aromas across your palate—while keeping shards crisp rather than chalky.
Surface‑Area Superpowers & Maillard Magic
Tiny crumbs expose massive starch-and-protein surfaces. As they hit hot oil, sugars and amino acids undergo the Maillard reaction—creating dozens of nutty, toasty aroma compounds in seconds.
Rapid Moisture Loss & Glassy Texture
Toasting drives moisture below ~10%, pushing the starch–protein matrix through its “glass transition.” The result is a hard, brittle crumb that fractures cleanly with every bite.
Why You’ll Love This Recipe
Naturally vegan and easy to make gluten-free
Adds crunch, flavour, and contrast to soft dishes like risotto or pasta
Made with simple, everyday ingredients
Takes just 10 minutes
Versatile — use on veggies, soups, casseroles, and more
Ingredients
Prep: 5 min • Cook: 5 min • Yield: 2 cups crunchy pangrattato
| Ingredient | US Measure | Metric |
|---|---|---|
| Stale bread, or panko | 3/4 cups | 45 g |
| Unsalted Butter | 3 1/2 Tbsp | 50 g |
| Garlic cloves, crushed | 2 | 2 |
| Fresh parsley, chopped | 1/4 cup | 15 g |
| Salt & pepper | to taste | to taste |
| Lemon zest | 1 lemon | 1 lemon |
Ingredient Notes From My Kitchen
Extras: Fresh herbs like parsley or thyme add freshness; chilli flakes bring heat; lemon zest gives a bright finish.
Bread: I have used panko but you can easily substitute your stale bread. Stale bread works perfectly and crisps up well for added texture.
Butter: I have used enough butter to provide flavour but also get the crumbs crispy. Unsalted butter helps to control the salt in the final product – I didnt want to end up making my breadcrumbs too salty! Most recipes use olive oil but I decided to use butter for flavour.
Garlic: I opted to crush the garlic cloves to get more control of the garlic flavour. If you like more garlic flavour, mince the garlic and add at the end to avoid burning.
Lemon: zesting a lemon adds a lovely hint of freshness to the breadcrumbs. I find that adding it right at the end, off the heat helps to keep the freshness high.
Equipment & Prep Tips
- Food processor vs. grater:
• Food processor (with grater blade) → ultra‑fine, uniform crumbs
• Box grater → chunkier texture, more rustic crunch - Skillet vs. oven-toast:
• Skillet on medium heat → precise control, garlic/to herbs infusion in 5 min
• Oven at 350 °F (175 °C) for 7–8 min → hands‑off for larger batches - Oil choice:
• EVOO for bright, peppery notes
• Butter or ghee for richer, nutty depth
How To Make Pangrattato
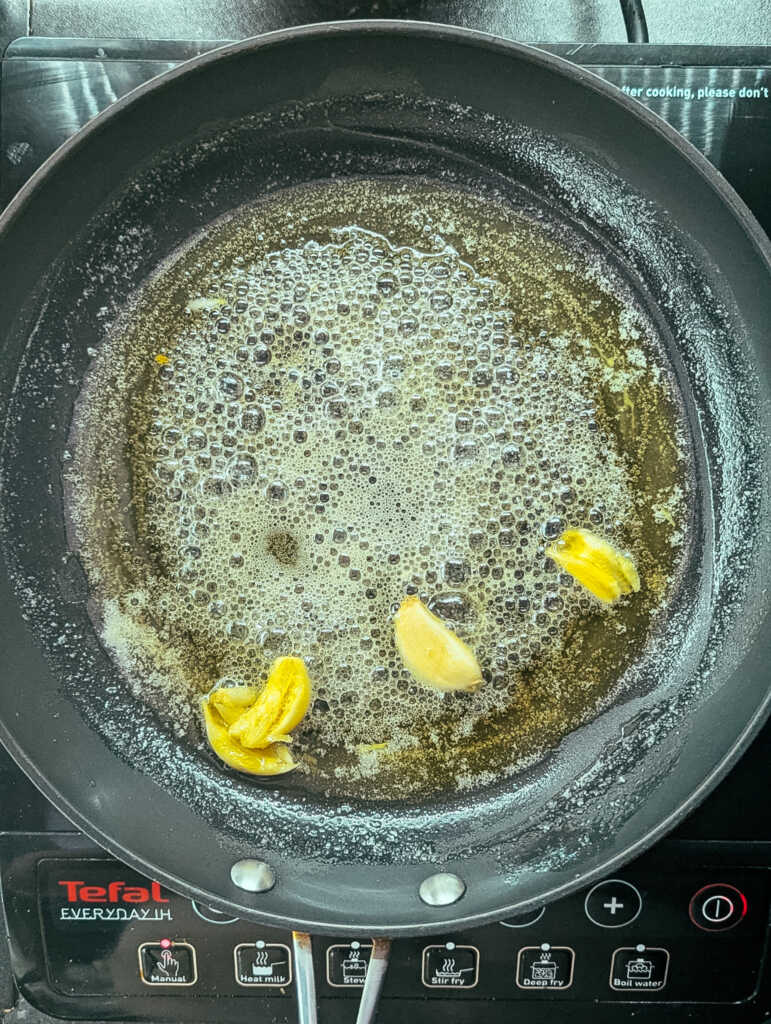
Toast the Garlic:
Heat the butter in a large non-stick skillet over medium heat. I like to peel and crush the garlic a little, but keeping it whole so the garlic flavour isn’t too strong throughout the finished breadcrumbs. Watch the heat, you don’t want to burn your garlic or it will go bitter and ruin the breadcrumbs. The garlic should not brown, just soften.
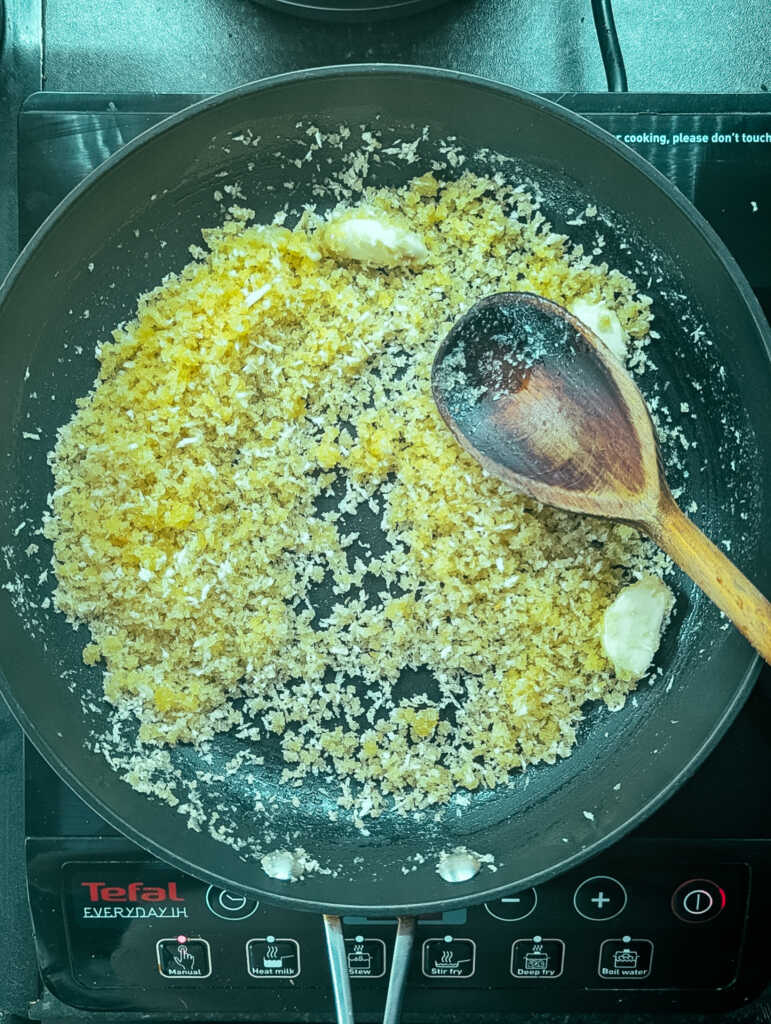
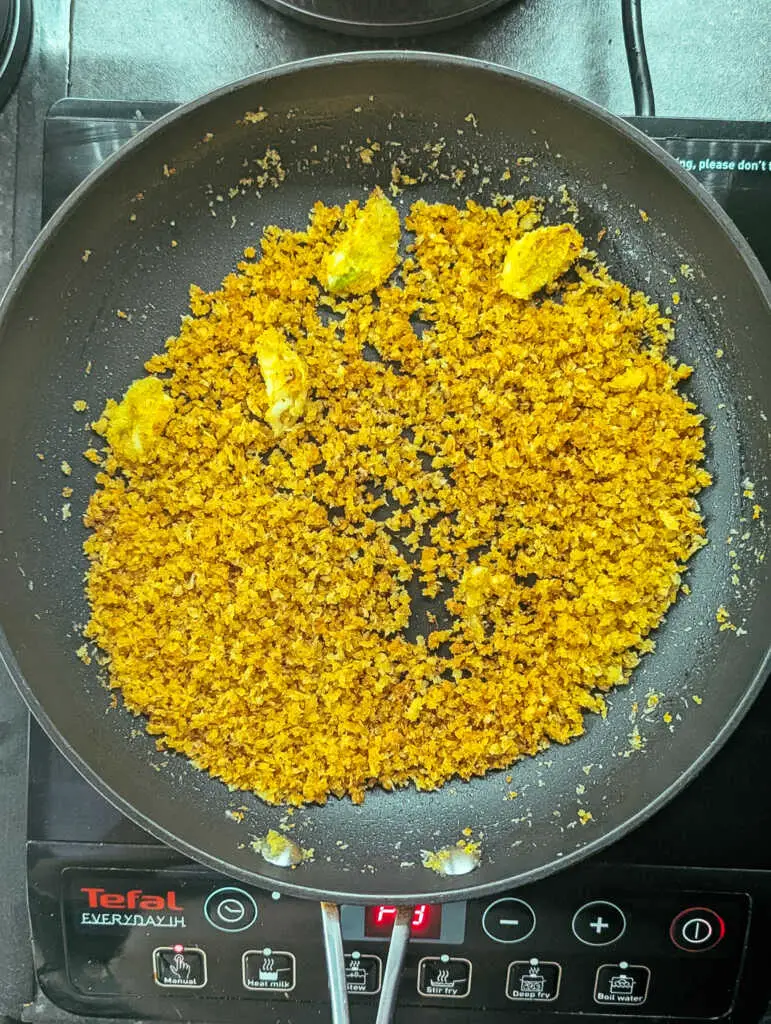
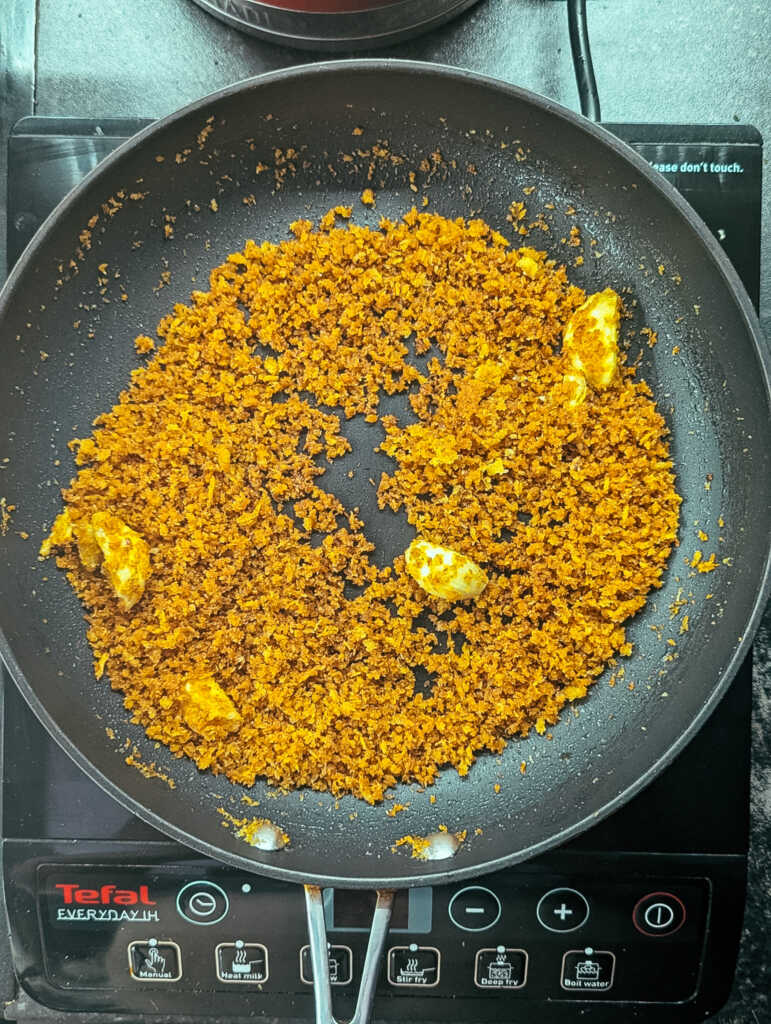
Toast the Breadcrumbs:
Add the breadcrumbs to the pan. Stir continuously to coat them evenly in the garlic-infused butter. Toast for 5–7 minutes until golden brown and crispy. You will notice the breadcrumbs turning golden and changing colour. Watch them carefully as they can burn very quickly. The crumbs should be golden and not dark, as dark crumbs are bitter.
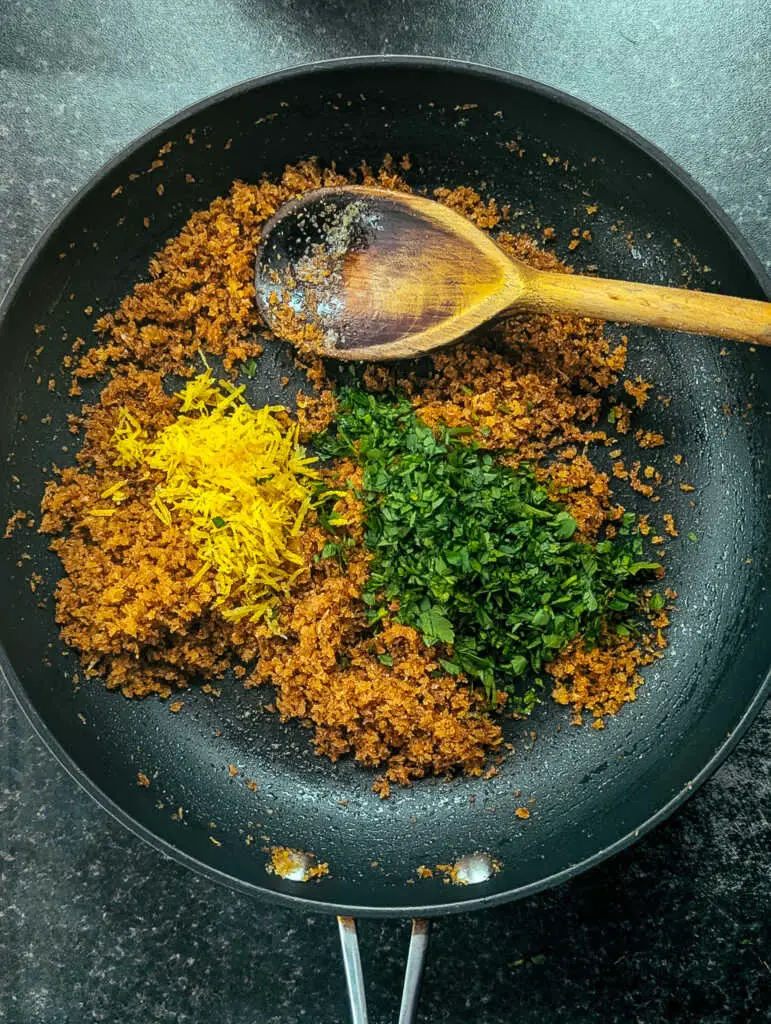
Add Flavour:
Once they are toasted and a good colour, stir in lemon zest and the parsley. Remove from the heat and season, tasting as you go so you get it how you like it. Remove the garlic cloves.
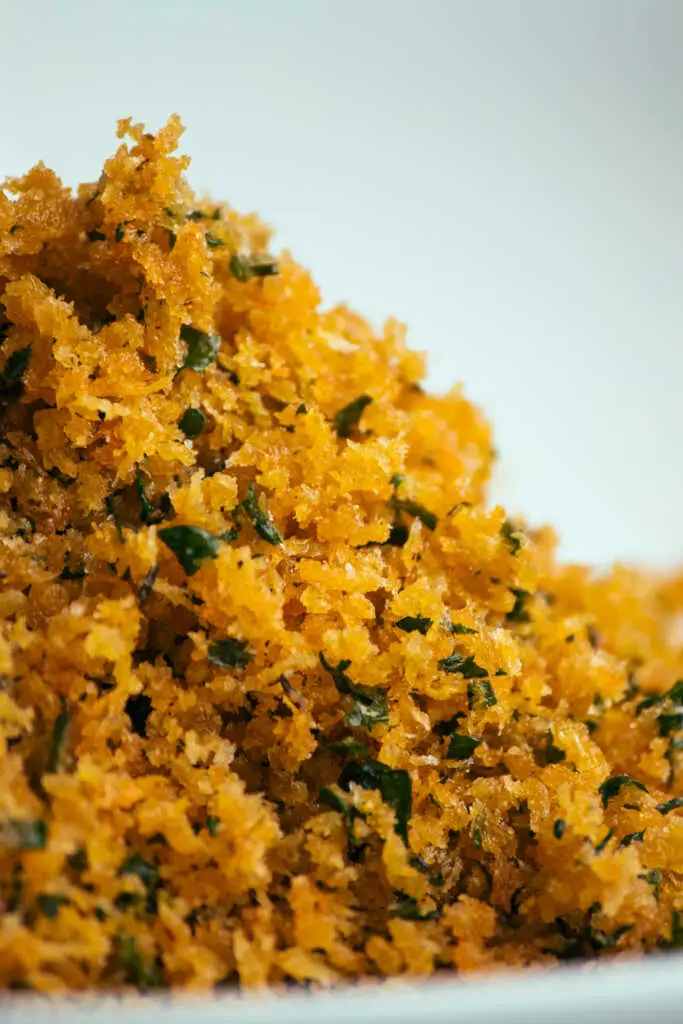
Cool and Store:
Add the breadcrumbs to a paper towel-lined bowl or plate to absorb any excess grease from the butter. Let them cool completely before storing them. Store in an airtight container at room temperature for up to 1 week. The finished crumbs should be dry and crisp if you feel them between your fingertips.
Tips From My Kitchen
- Dry bread is key — if it’s still fresh, slice it and dry in a low oven before blitzing.
- Pulse if using stale bread – this helps you to control the texture of the breadcrumbs, you dont want them like dust.
- Medium-low heat gives more control — pangrattato can go from perfect to bitter fast.
- Toast in batches if you’re making a large quantity — overcrowding traps steam and makes for soggy crumbs
- Cool completely before storing so it stays crisp as the condensation can cause the crumbs to go soggy
- Use Kitchen paper – transfer the crumbs when done to kitchen paper to blot up any excess butter and ensure they stay crisp
What Can Go Wrong (And How to Fix It)
- Garlic burns before crumbs are toasted? Add garlic later in the cooking process or cook on a lower heat.
- Bread crumbs soggy instead of crisp? Bread may have been too fresh, or pan overcrowded — dry bread properly and toast in smaller batches. Let them cool completely before storing. You can also try using a larger frying pan and finishing the crumbs in the oven to dry them out
- Uneven browning? Stir constantly and make sure oil is evenly distributed before toasting. Also make sure that the breadcrumbs are an even size so that they cook evenly.
- Too oily? You likely added more oil than the crumbs could absorb — add slowly while tossing.
- Clumping? Happens if crumbs are too damp — dry bread well and avoid over-oiling.
- Bitter crumbs? The heat was probably too high and you have burned the crumbs. Keep the heat low and gentle and constantly stir.
Tried and Tested Variations
- Garlic & Lemon Zest: Bright and aromatic — perfect for fish and pasta.
- Chilli Pangrattato: Add crushed chilli flakes for heat.
- Anchovy Pangrattato: Melt anchovy fillets in the oil before adding crumbs for savoury depth.
- Herb Pangrattato: Toss through chopped fresh herbs after toasting for freshness.
- Nutty Pangrattato: Add toasted pine nuts or almonds for extra crunch.
Timing Notes From My Kitchen
From blitzing stale bread to a jar of golden crumbs, it takes me about 10 minutes. I usually make a double batch and store the rest for quick use.
Serving Suggestions
- Sprinkle over creamy pasta dishes like mac and cheese or Alfredo for contrast
- Add on top of roasted vegetables for texture
- Use on soups or stews as a savory crunch
- Top baked eggs or casseroles just before serving
- Mix with lemon zest and herbs for a fresh fish topping
💡 Try it sprinkled on my penne aglio e olio! Try sprinkling pangrattato over spaghetti Napoli, carbonara, or any of my favorite pasta dishes from this Easy Pasta Recipes roundup
If you’re planning pasta night, check out my Easy Pasta Recipes hub
Pangrattato Flavour Variations
| Variation | Add‑Ins | Tips |
|---|---|---|
| Lemon & Herb | Zest of ½ lemon + 1 Tbsp chopped parsley | Stir in zest off‑heat to preserve brightness |
| Chili & Garlic | ¼ tsp red pepper flakes + garlic last min | Add garlic first, then flakes in the last 30 s |
| Anchovy & Caper | 1 anchovy fillet, chopped + 1 Tbsp capers | Sauté anchovy in oil until it melts first |
| Cheesy Nutty | 2 Tbsp grated Parmesan + 1 Tbsp chopped nuts | Stir in cheese off‑heat to avoid clumping |
Tips for Perfect Pangrattato
- Choose the Right Bread:
Use sturdy, rustic bread for the best crunch if using leftover bread. - Let It Dry Naturally:
If the bread isn’t fully stale, cube it and leave it out overnight to dry thoroughly or on a low heat in the oven till dry. - Low and Slow Toasting:
Toast breadcrumbs over medium to medium-low heat. If the heat is too high the panko will burn very quickly. - Flavour It Your Way:
Customize your pangrattato with:- Crushed red pepper flakes for a bit of heat
- Anchovy paste for a deep umami hit
- Use other fresh herbs, like rosemary and thyme
- Grated Parmesan for even more savoury flavour (watch the seasoning as parmesan will add plenty saltiness to the breadcrumbs)
Mistakes to Avoid
- Overprocessing the Bread:
If you decide to use your own stale bread, it can be useful not to overprocess it too fine. You will lose crunch and texture if the crumbs are like dust. - Burning the Garlic:
Garlic burns fast! Always sauté it gently before adding breadcrumbs. - Adding Fresh Herbs Too Early:
Fresh herbs can burn easily and turn bitter. Add them after toasting for the best results. - Skipping the Seasoning:
A little salt goes a long way when it comes to flavour. Don’t skip this small but crucial step. It will also help to keep the breadcrumbs crispy. - Storing While Warm:
Always cool pangrattato completely before storing. This will help to prevent moisture buildup and sogginess.
Pangrattato Storage & Shelf‑Life
- Room temp: Airtight jar for up to 2 weeks.
- Freezer: Freezing the breadcrumbs can cause them to go soggy when thawed. I don’t recommend freezing them.
- Cheese‑added version: Store in fridge for up to 3 days.
- Reheating: you can reheat the crumbs gently to make them crispy if they lose their texture. Use an oven at 160°C for 3-4 minutes or use a dry pan over medium heat.
Dietary Adaptations
Low‑Sodium: Skip added salt; boost flavor with extra herbs or a dash of soy sauce.
Gluten‑Free: Use certified GF breadcrumbs or grind GF bread—expect a slightly softer crunch.
Vegan: Swap butter for vegan block or extra EVOO; omit cheese or add a sprinkle of nutritional yeast.
FAQ’s
Yes, but fresh or homemade breadcrumbs give a better texture and flavor. Avoid pre-seasoned varieties.
Only if you use gluten-free bread — the rest of the ingredients are naturally gluten-free. You can swap out with gluten-free bread to make your breadcrumbs gluten-free.
Absolutely! Parmesan or finely chopped walnuts can add extra richness.
They’ve absorbed too much oil or weren’t toasted long enough. Toast over medium heat, stirring constantly, until golden‑brown, then drain on paper towels.
Garlic browns faster than bread. Add minced garlic in the last minute of toasting and keep heat moderate to avoid bitterness or do as I do and just add the whole crushed cloves for a gentle garlic flavour. If you like a strong garlic hit, add minced garlic.
Use a wide skillet and an even layer. Don’t overcrowd the pan—toast in batches and stir frequently for uniform colour.
Technically, yes, you can, but I have found the moisture from thawing causes them to go soggy, so I don’t recommend it.
Its a matter of preference, oil will still give you really crispy results. Just remember when using butter that it will cause the crumbs to brown faster, so keep an eye on them!
You don’t want to have them too fine if you are making your own crumbs. Think of small grains of rice as a size guide for your crumbs.
Serving & Pairings
Pangrattato is perfect on light pasta dishes (e.g., aglio‑e‑olio), bright salads (fennel‑orange, arugula), and roasted vegetables (asparagus, green beans). For wine, a crisp Vermentino or light Chianti beautifully complements its nutty, toasty flavor.
Nutrition & Allergen Information (per tablespoon)
Allergens: Contains gluten (swap as noted); dairy if cheese is added.
Calories: 60 kcal
Carbs: 6 g | Fat: 3.5 g | Protein: 1 g
Why This Recipe Works
I love recipes like this — simple, flexible, and rooted in tradition. Pangrattato turns basic bread into a golden, garlicky sprinkle that can transform a meal in seconds. I’ve tried different variations, but this lemon-and-herb combo is my go-to for brightness and balance.
It’s become a weekly staple in my kitchen — I always keep a jar ready to go.
Why not give it a try tonight?
If you make your pangrattato with your own flavours — I’d love to hear what you come up with! Leave a comment below and share your favourite variation.
About The Cook
I’ve been cooking Mediterranean dishes at home for over a decade, and pangrattato is one of my favorite zero-waste tricks. It’s a simple, flavorful way to elevate everyday meals with almost no effort.
Further Reading
Cucina Povera – 5 Traditional Recipes
Serious Eats: An Introduction To The Maillard Reaction
You Might Also Like
Final Thoughts
Whether you’re making a quick pasta dinner or dressing up leftovers, pangrattato is the crunchy magic you didn’t know you needed. It’s easy to make, endlessly adaptable, and adds that “chef’s kiss” finishing touch.
Try it once — you’ll want to sprinkle it on everything. 👨🍳

How to Make Perfect Pangrattato (Italian Breadcrumbs)
Equipment
- 1 frying pan
- 1 box grater
- 1 chefs knife
- 1 wooden spoon
- 1 set of digital scales
- 1 set of measuring cups
Ingredients
- ¾ cup of panko breadcrumbs
- 50 g melted unsalted butter
- 2 large garlic cloves
- Zest of 1 lemon
- ¼ cup chopped fresh parsley
- Salt and pepper to taste
Instructions
- Toast the Garlic:
- Heat the butter in a large skillet over medium heat. Add the crushed garlic and sauté for 1-2 minutes to help flavour the butter
- Toast the Breadcrumbs:
- Add the panko to the skillet. Stir continuously to coat them evenly in the garlic butter. Toast for 5–7 minutes until golden and crispy. Make sure to keep stirring as they can burn.
- Add Flavour:
- Remove from the heat and stir in the lemon zest, parsley and seasoning. Remove the garlic cloves
- Cool and Store:
- Let the pangrattato cool completely on a paper-towel lined tray/plate before storing in an airtight container. Keeps well at room temperature for up to 1 week.
Notes
- These breadcrumbs need to be constantly stirred so they don’t burn. As you do this, you will notice they slowly start to change colour and become more golden.
- The texture of these breadcrumbs is quite fine, if you want more bite, replace the panko for stale bread and use a food processor to get the right ‘size’ of breadcrumbs.
- I have used unsalted butter, so that the seasoning can be controlled. You can use salted butter but be mindful of this when you come to season your breadcrumbs.

Hi, I’m Paul! I’m a passionate home chef, recipe developer, and food lover who believes that cooking should be fun, rewarding, and stress-free! Through Scoffs & Feasts, I share my favorite tried-and-tested recipes, cooking tips, and troubleshooting advice to help home cooks gain confidence in the kitchen. Whether you’re a beginner or an experienced foodie, I hope my recipes inspire you to try something new.