
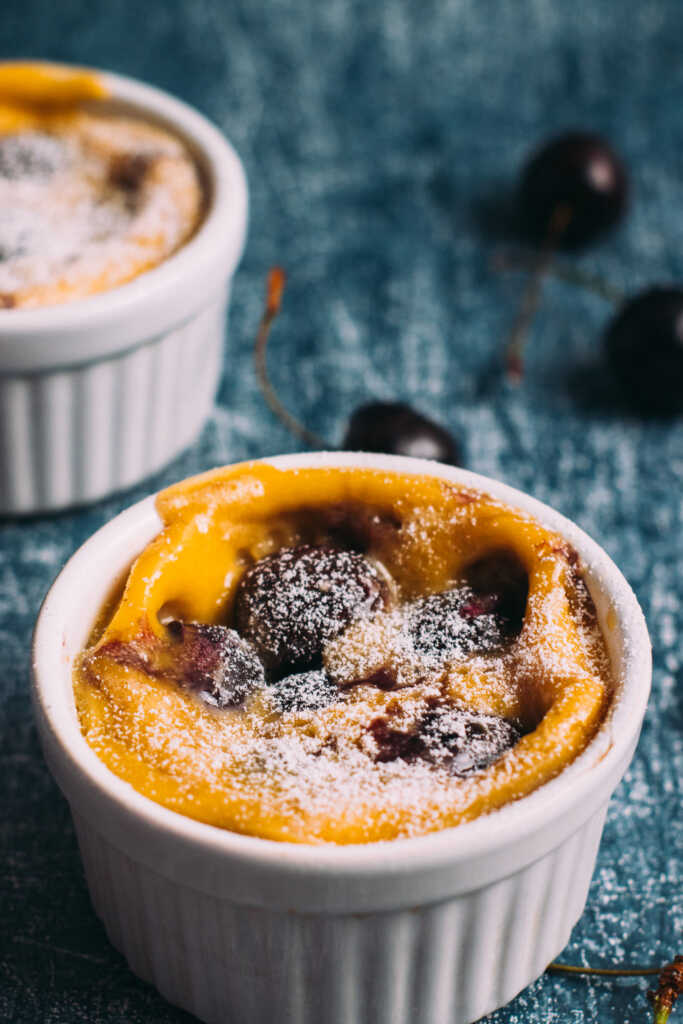
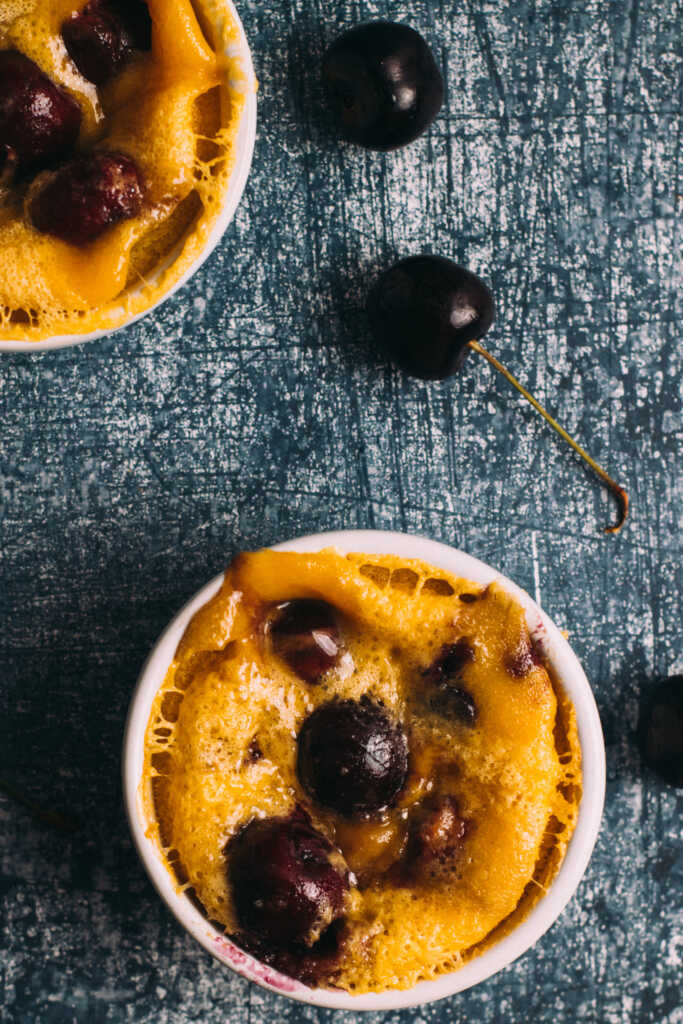
Easy Mini Clafoutis are baked custard desserts that are so simple to make and ready in no time. They are bursting with black cherries and a hint of cherry brandy…
What Is Clafoutis?
Clafoutis is a classic French dessert, pronounced “klah-foo-tee. It is both elegant and a delicious light dessert. This traditional dish consists of fresh stone fruit, usually cherries, baked in a light custard-like batter. It’s the perfect way to showcase seasonal fruits and impress your guests with minimal effort. The word ‘clafoutis’ comes from southern France, where it means ‘to fill.’ This reflects how the dish is prepared – with fruit being filled into a baking dish before you pour batter over the fruit. The name describes the cooking process and hints at the dish’s rustic nature and is perfect for any day of the week. Find more ideas in my Easy Dessert Recipes collection
Ingredients
Mini Clafoutis is made with just a few simple ingredients:
- Fresh Cherries – this is a classic clafoutis, the cherry version, but you can swap out the fresh fruit for your favourite seasonal fruit if you prefer something different. Usually any stone type of fruit will work, like fresh peach slices or plums
- Cherry Brandy – this lovely stuff is packed with cherry flavour and brings the cherries and whole dessert to life. If you don’t have this, you can also try using almond extract as an alternative
- Eggs – these are used to make a rich custard
- Double Cream – makes a luscious creamy custard
- Plain Flour – to bring the wet ingredients together and form a batter
- Caster Sugar – to sweeten the custard batter
How To Make Easy Mini Clafoutis
- Preheat your oven to 160°C and grease your ramekins with butter
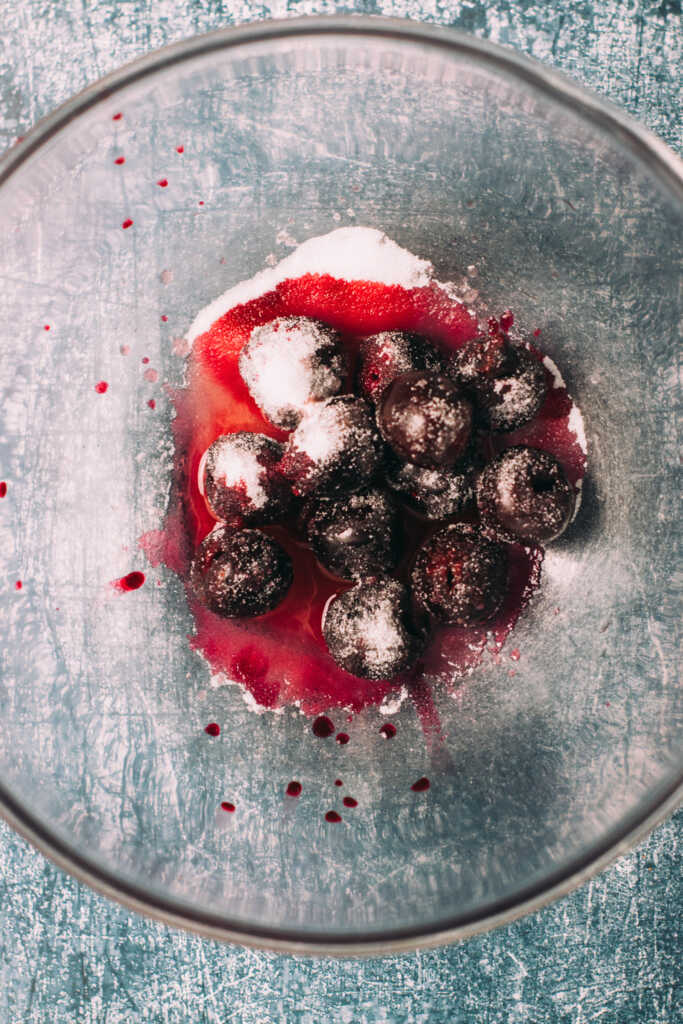
- Pit the cherries. Add the cherry brandy and sugar and leave to sit for 5 minutes in a medium bowl to soak up the brandy and macerate in the sugar
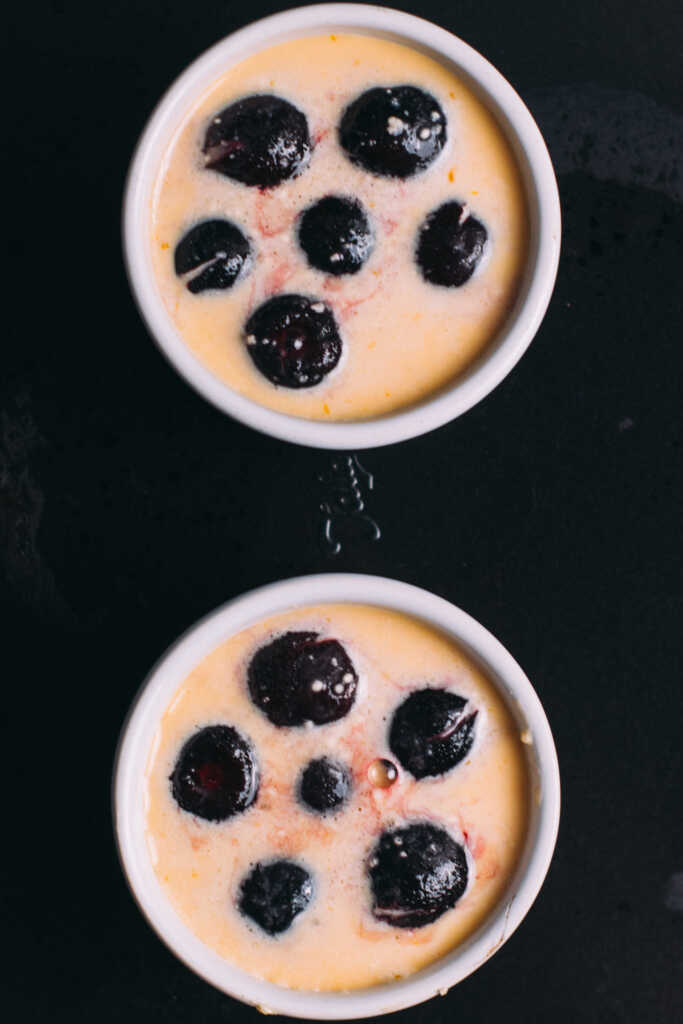
- Place the pitted cherries in a single layer at the bottom of the prepared ramekins
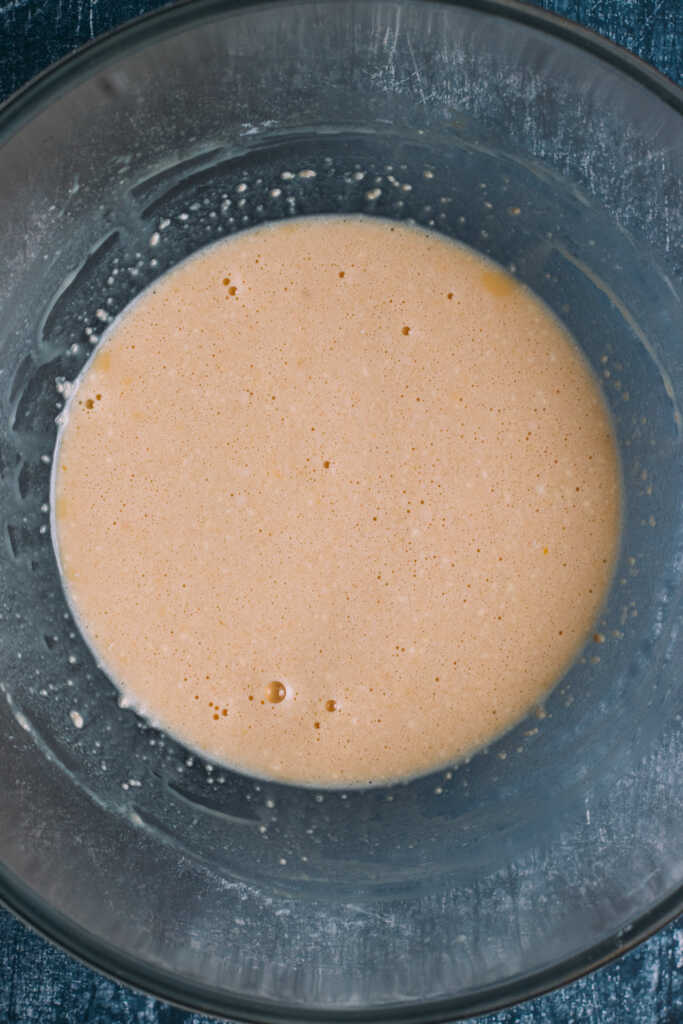
- Whisk the flour, sugar, eggs and egg yolk, cream, vanilla extract/vanilla pod, and salt in a large mixing bowl until smooth. Be careful not to over-whisk. The batter should be quite loose and runny.
- Pour the batter over the cherries in the ramekins.
- Bake for 20-25 minutes in a preheated oven with the ramekins on a tray or cookie sheet or until the Clafoutis is set and golden brown on top. You can insert a cake tester into the middle to check for doneness. The tester should be clean but there should still be a wobble in the centre.
- Remove from the oven and let it cool slightly before serving. I like to give these 15 minutes, so they are warm but not piping hot when you serve them.
- Dust with icing sugar before serving.
Why Is My Mini Clafoutis Runny?
If your Mini Clafoutis ends up runny, there could be a few reasons for this. Here are some common reasons why your Clafoutis might be runny:
1. Too much liquid: Adding too much milk or cream to the batter can produce a runny texture. Make sure to follow the recipe closely and measure out ingredients accurately.
2. Underbaking: If you didn’t bake the Clafoutis long enough, the custard may need more time to set correctly. Be sure to bake it until the centre is set and slightly jiggly.
3. Not letting it cool: Let the Clafoutis cool completely before slicing into it. The custard will continue to firm up as it cools, so cutting it too soon can result in a runny consistency.
4. Using frozen fruit: If you use frozen fruit in your Clafoutis, excess moisture can make the dessert more watery. Thaw and drain any excess liquid from frozen fruit before adding it to the batter.
5. Overmixing: Be careful not to overmix the batter, as this can incorporate too much air and lead to a runnier texture once baked.

Freezing Clafoutis
Clafoutis can be frozen, which is a great way to preserve some for later use. First, allow it to cool completely after baking. Once cooled, wrap the Clafoutis tightly in plastic or aluminium foil to prevent freezer burn. You can also place the wrapped Clafoutis in an airtight container for protection.
When you fancy some clafoutis, remove it from the freezer and let it thaw in the fridge overnight. You can also reheat frozen Clafoutis in the microwave or oven until warm.
Freezing may slightly change the texture of the Clafoutis, but it should still taste delicious! The custard can become a bit denser, but this change in texture is normal and doesn’t affect the overall taste.
How To Serve Clafoutis
Traditionally, Clafoutis is served warm straight out of the oven, allowing the fruit to release its juices and the custard to set.
However, Clafoutis can also be served cold. Allowing it to cool completely in the fridge before serving can produce a different texture and flavour. The custard may become firmer and denser when chilled, while the fruit’s flavours may intensify as they meld together with the batter.
Some people even prefer eating clafoutis cold as it enhances the flavours and makes for a refreshing dessert on a hot day. Serving clafoutis cold can also be a practical choice for preparing for gatherings or parties ahead of time.
Whether you serve your Clafoutis warm or cold is entirely up to personal preference. Both ways offer unique taste experiences equally tasty, so feel free to experiment and see which way you prefer!
Can You Make Clafoutis In Advance?
Yes, Clafoutis can be made in advance! Making it ahead of time can be a great way to save time and stress when preparing a meal for guests or just wanting to have a delicious dessert on hand.
To make Clafoutis in advance, follow the recipe as usual, but instead of baking it right away, cover the dish with plastic wrap and store it in the refrigerator for up to 24 hours before baking.
When you’re ready to bake your Clafoutis, cook in a preheated oven and then pop the dish in to bake according to the recipe instructions. The chilled batter may take a few extra minutes to cook, so keep an eye on it towards the end of the baking time.
Once baked, let your Clafoutis cool slightly before serving. Even if made ahead of time, it will still taste delicious and have that classic custardy texture.
Although cherries are the most common fruit in Clafoutis, other fruits such as berries, peaches, or plums can also be used. Some variations even include savoury ingredients like tomatoes or mushrooms.
How To Tell When Clafoutis Is Done
So, when is Clafoutis done? The key to knowing when your Clafoutis is ready is to look for the tell-tale signs of doneness. The top of the Clafoutis should be golden brown and slightly puffed up, indicating that it has cooked through. You can also test its doneness by inserting a knife or toothpick into the centre – if it comes out clean, then your Clafoutis is done.
It’s important not to overbake your Clafoutis as it can become dry and tough. Keep an eye on it towards the end of baking to ensure it doesn’t stay in the oven too long.
Once your Clafoutis is done baking, let it cool slightly before serving. It can be enjoyed warm or at room temperature, topped with powdered sugar or a whipped cream dollop for extra sweetness.
Is Your Clafoutis Rubbery?
If your Clafoutis turns out rubbery, there are a few possible reasons for this texture issue. One common reason could be that you overmixed the batter. Overmixing can create too much gluten development in the flour, resulting in a tough and rubbery texture.
Another reason could be that you baked the Clafoutis for too long or too high a temperature. Overbaking can cause the custard to become overcooked and rubbery instead of creamy and smooth.
Additionally, low-fat or skim milk instead of whole milk or heavy cream can produce a rubbery texture. The fat content in dairy products helps create a rich and creamy custard, so using lower-fat options may lead to a less desirable consistency.
To avoid a rubbery clafoutis, try mixing the batter until just combined, being careful not to overmix. Also, make sure to bake the Clafoutis at the correct temperature and at the appropriate time according to your recipe. Lastly, use full-fat dairy products for a creamier texture.
Try Another Recipe

Easy Mini Clafoutis
Equipment
- 4 10cm porcelain ramekins
- 1 large whisk
- 1 set of measuring spoons
- 1 measuring jug
- 1 set of digital scales
Ingredients
- 180 g whole pitted cherries
- 2 tbsp cherry brandy (or kirsch)
- 120 g caster sugar
- 2 large eggs
- 2 egg yolks
- 1 tsp vanilla extract
- 50 g plain flour
- 200 ml double cream
Instructions
- Begin by pitting the cherries using a straw or skewer. You can also cut them in half to remove the pit.
- Place in a bowl with 2 tbsp of cherry brandy (or kirsch) and 2 tbsp of caster sugar and leave for 5 minutes to macerate
- Make the batter by whisking the eggs, remaining sugar, flour, double cream and vanilla together until smooth – do not overwhisk
- Place the cherries in the bottom of each buttered ramekin, then pour the batter over until the ramekin is filled
- pour any remaining juices from the cherries into the ramekins
- Bake in a preheated oven at 160℃ for 20-25 minutes until set around the edges and a jiggle in the centre
- Leave to rest for 15 minutes and enjoy warm with a dusting of icing sugar

Hi, I’m Paul! I’m a passionate home chef, recipe developer, and food lover who believes that cooking should be fun, rewarding, and stress-free! Through Scoffs & Feasts, I share my favorite tried-and-tested recipes, cooking tips, and troubleshooting advice to help home cooks gain confidence in the kitchen. Whether you’re a beginner or an experienced foodie, I hope my recipes inspire you to try something new.