

Key Highlights
- Ciabatta rolls are easy to make and require no kneading.
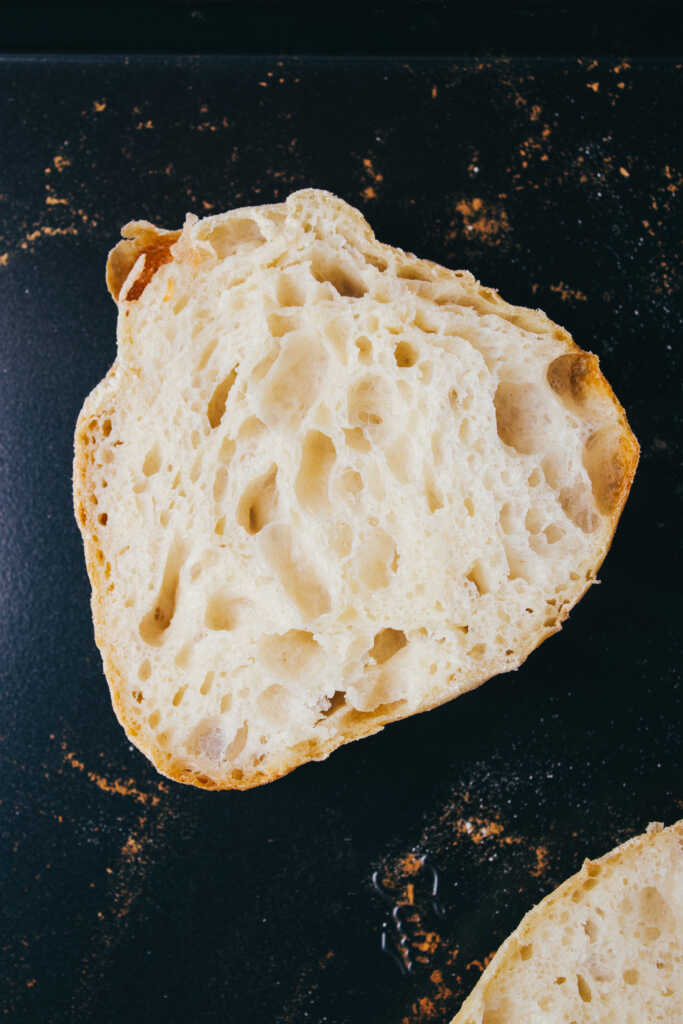
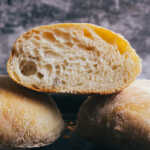
- These rolls have a crispy crust and a soft, airy crumb, making them a delight to eat.
- The dough for ciabatta rolls has a high hydration level, resulting in large, open pores.
- The recipe uses only 5 simple ingredients – flour, yeast, salt, and water and olive oil
- The dough is formed using a stand mixer, allowing for optimal gluten development.
- The rolls can be served alongside various dishes or used to make sandwiches or garlic bread.
Introduction
I love the smell of freshly baked bread wafting through the kitchen. And when it comes to homemade bread, ciabatta dinner rolls are a real treat. These rolls have a crispy, crackling crust, open pores, and a delicate crumb, giving them a distinctive flavour and texture that is gorgeous to eat. The best part? They’re easy to make and require absolutely no kneading – just a stand mixer.
Unlike regular bread rolls, ciabatta bread rolls are a classic example of a high-hydration dough. To give you an idea, regular white bread has about 60% hydration whereas ciabatta bread has 80%. Due to this high amount of water content, ciabatta bread rolls typically have a crackling crust on top with large open pores when sliced.
So let’s dive in and uncover the secrets to making these quick and delicious ciabatta dinner rolls.
Exploring the Origins of Ciabatta Bread
Ciabatta bread, also known as Italian bread, originated in Italy and is characterized by its elongated shape and rustic appearance. The word “ciabatta” translates to “slipper” in Italian, which refers to the bread’s long and flat shape that resembles a slipper. Ciabatta bread is often used to make sandwiches, bruschetta, and garlic bread. Today, we will be focusing on a variation of ciabatta bread known as ciabatta dinner rolls, which are perfect for serving alongside a meal or as a base for sandwiches.
Ciabatta bread is made using a simple recipe that consists of flour, water, yeast, and salt and olive oil. The dough is mixed together to form a sticky, wet dough that is then fermented and shaped into loaves or rolls. The high hydration level of the dough gives ciabatta bread its characteristic open crumb and chewy texture. This biga bread recipe is typically baked at a high temperature to achieve a crispy crust.
Evolution into Dinner Rolls
Over time, ciabatta bread has evolved into different variations, one of which is the ciabatta dinner roll. These smaller-sized rolls are perfect for serving alongside a meal or using as a base for sandwiches. The process of making ciabatta dinner rolls is similar to that of making traditional ciabatta bread, but the dough is divided into smaller portions and shaped into individual rolls. This allows for faster baking and easier portion control. Homemade ciabatta rolls are a great alternative to store-bought dinner rolls, as they can be customized to your liking and are guaranteed to be fresh and delicious. With their crispy crust and soft, airy texture, these homemade ciabatta dinner rolls will be a hit at your next meal or gathering.
Essential Ingredients for Ciabatta Dinner Rolls
To make homemade ciabatta dinner rolls, you will need just a few basic ingredients that you may already have in your pantry. Here’s what you’ll need:
- Strong white bread flour: This provides the structure and texture for the rolls.
- Instant yeast: This helps the dough rise and gives the rolls their soft and airy texture.
- Salt: This enhances the flavour of the rolls.
- Water: The water hydrates the dough and activates the yeast.
- Olive oil: This adds flavour and richness to the rolls.
Key Ingredients Overview
When venturing into making homemade ciabatta rolls, ensure you have the essential ingredients ready. Basic items like bread flour and instant yeast are crucial. Olive oil for that Italian touch, and table salt for flavor balance. Lukewarm water aids in the dough’s hydration, while parchment paper prevents sticking. Experiment with whole wheat flour for a nutty twist. These simple ingredients combined in the right proportions create the base of your delicious ciabatta dinner rolls.
Choosing the Right Flour for Ciabatta
For ciabatta, selecting the correct flour is paramount. Bread flour, known for its high gluten content, is ideal. It provides the necessary structure for the dough to rise properly, resulting in those big airy pockets characteristic of ciabatta. For a wholesome twist, whole wheat flour can be incorporated for added depth of flavour. Experimenting with different flour combinations can yield varying textures and tastes. Remember, the quality of your flour directly impacts the outcome of your homemade ciabatta rolls. So, choose wisely, and let the flour work its magic in creating these delectable dinner delights.
Step-by-Step Guide to Making Ciabatta Dough
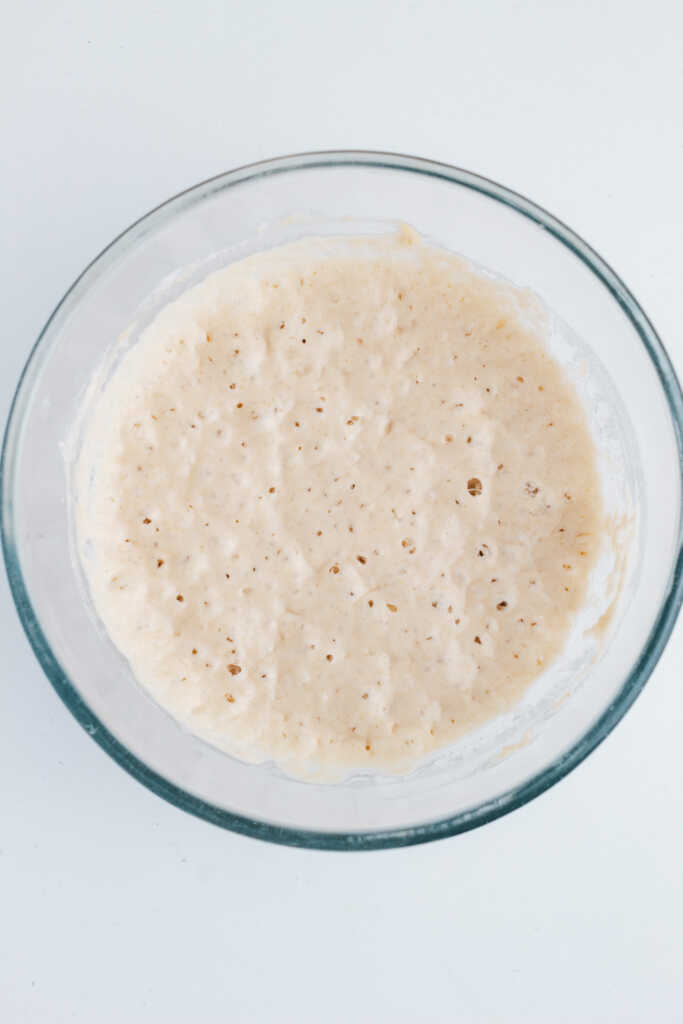
Step 1.
This recipe uses a poolish, where equal parts of flour and water are prefermented overnight for maximum flavour. Mix lukewarm water with yeast in a large bowl. Add flour and salt, stirring until combined. Let the sticky dough rest overnight, around 12-15 hours. The next day it should be lovely and bubbly and ready to make your delicious bread with!
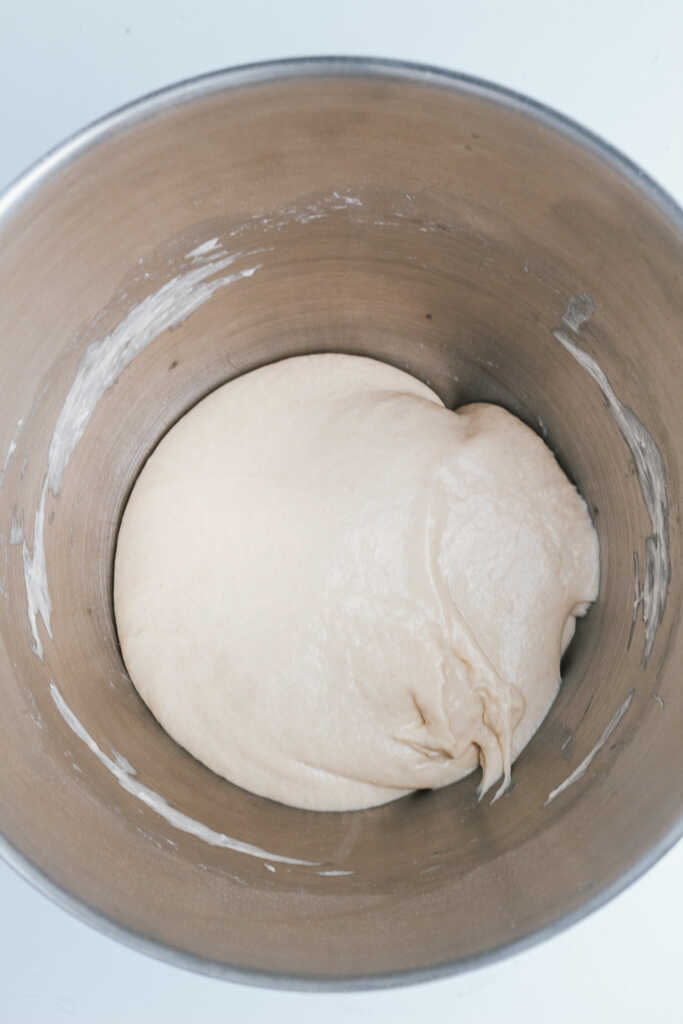
Step 2.
The next day, combine the poolish with the rest of the flour, yeast and water. This mixture is then worked with the dough hook attachment on your stand mixer. This dough is a very wet dough so it may appear like nothing is happening as you mix with the dough hook. Keep an eye on it and as the gluten develops, the dough pulls away from the sides of the bowl. When it does this and collects around the dough hook in ball of dough, it is ready. This should take around 10 minutes or so in the stand mixer.
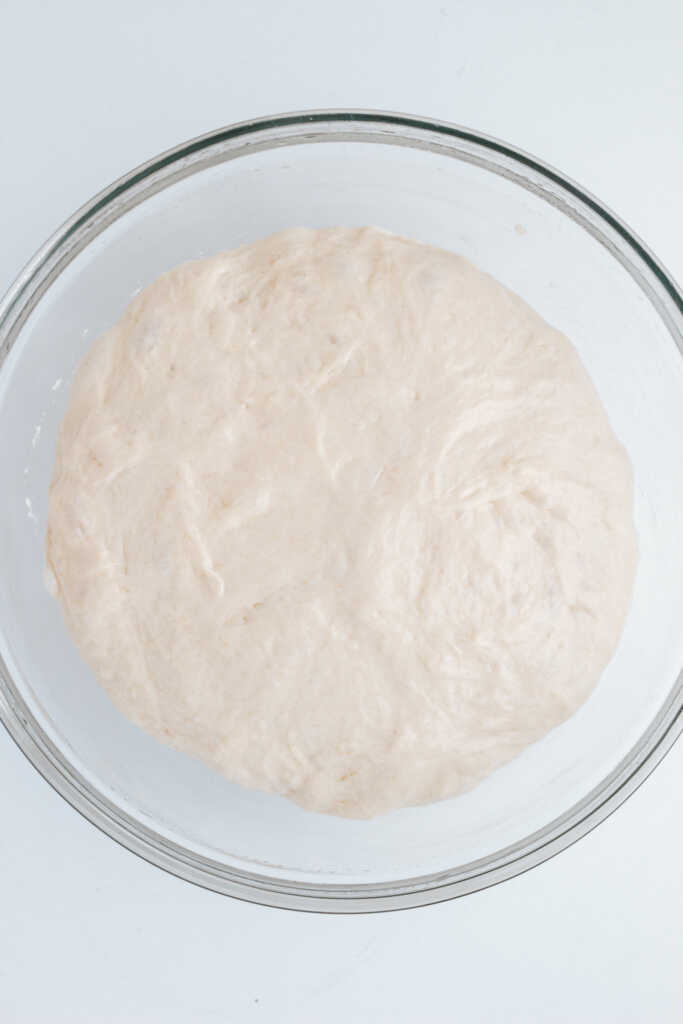
Step 3.
Place the dough into a greased bowl and cover. Leave in a warm place to double in size.
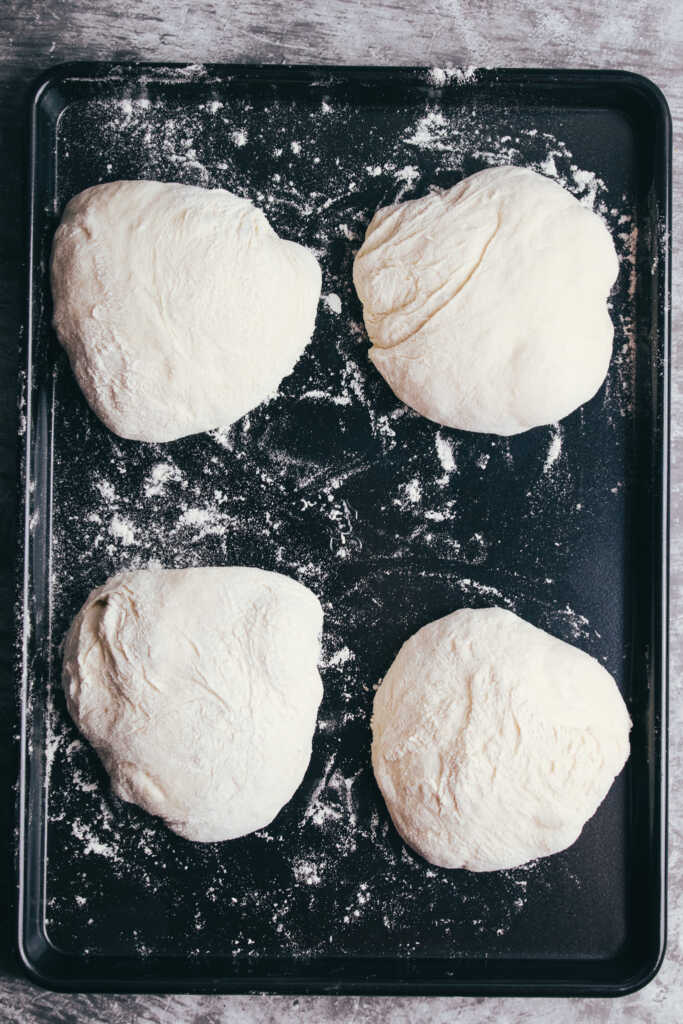
Step 4.
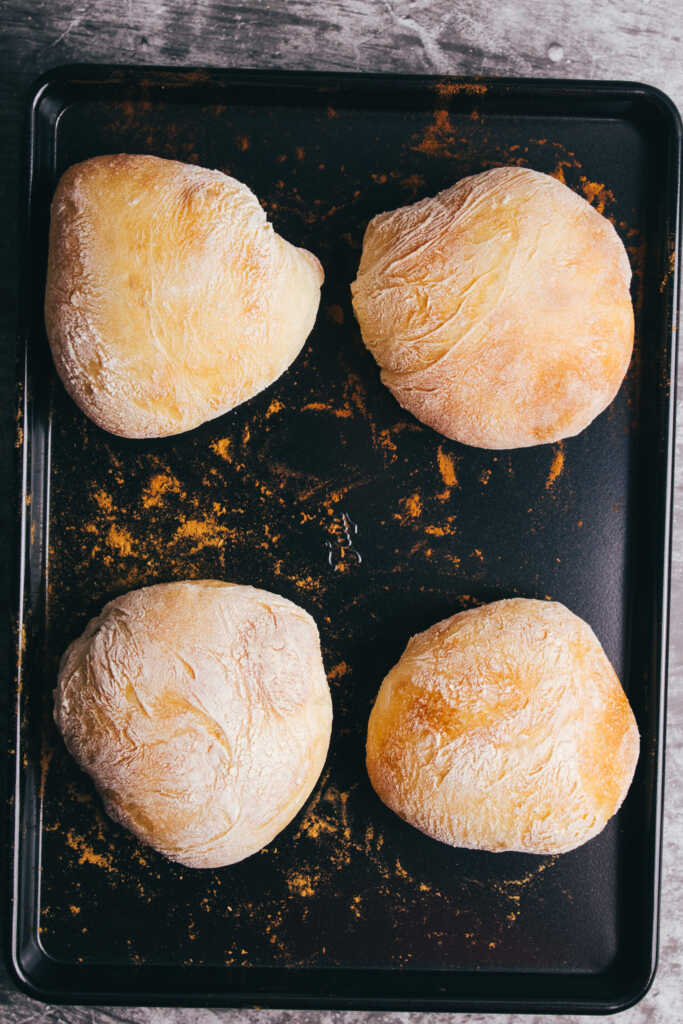
Once doubled, the dough is stretched over itself 7 or 8 times then left to rest until puffy again. This process is repeated again then the dough is portioned into rolls and left to rest. I do this by gently shaping the dough into a log and cutting into equal portions. the great thing about ciabatta rolls is you don’t need to shape them into perfect round balls. They are meant to be that funny shape! Alternatively you can bake the dough without portio
Step 5.
Once the rolls are shaped, you can leave them to rise until puffy – around another 30 minutes or so depending on how warm your kitchen is.
Step 6.
Bake! These little beauties should take around 20 minutes in the oven to get crisp and brown.
Understanding Hydration Levels
To master the art of crafting perfect ciabatta dinner rolls, understanding hydration levels is key. Hydration, in simple terms, refers to the ratio of water to flour in your dough. You might have heard it called bakers percentages. A high hydration level results in a wetter, stickier dough, crucial for achieving that signature airy texture and open crumb in ciabatta bread. Embrace the sticky dough; it’s a good sign! Experiment with different hydration levels to find your preferred balance between ease of handling and the desired end texture. Remember, practice makes perfect, and don’t be afraid to get your hands a little messy in the process.
The Secret to Perfect Fermentation
Fermentation is the magical process that gives Ciabatta its irresistible taste and texture. Creating the ideal environment for fermentation is key to achieving those coveted air pockets and that deliciously tangy flavour. The secret? Patience and precision. Allowing the dough to rest and rise slowly at the right temperature ensures that the yeast has enough time to work its magic. This slow process develops the complex flavours and the airy structure that distinguish Ciabatta from other bread varieties. Mastering the art of fermentation elevates your homemade Ciabatta dinner rolls to bakery-quality status.
Pre-Fermentation Explained
During pre-fermentation, your ciabatta dough undergoes vital transformation. This stage allows the flavours to develop and the gluten structure to strengthen. The dough rests in a warm environment, covered to prevent drying. This process enhances the texture and taste of your ciabatta dinner rolls. The longer, slower fermentation leads to a more complex flavour profile.
Time and Temperature Considerations
When it comes to making perfect ciabatta dinner rolls, time and temperature play crucial roles in the fermentation process. Allowing the dough to rest at the right temperature for the specified time is key to developing that unmistakable flavour and airy texture. It’s important to monitor the ambient temperature during fermentation to ensure ideal conditions for yeast activity. Additionally, adjusting the proofing time based on room temperature variations can help achieve consistent results. By carefully regulating time and temperature, you can elevate your homemade ciabatta rolls to a whole new level of deliciousness.
Shaping Your Ciabatta Dinner Rolls
To shape your ciabatta dinner rolls, gently turn the sticky dough out onto a well-floured work surface. Using a bench scraper, divide the dough into equal portions. With wet hands, gather each portion into a loose ball. Lightly stretch and shape the dough, keeping a high hydration level for that airy texture. Placing them on parchment paper on a baking sheet, let them rest and rise until puffy. Before baking, gently dimple the dough with your fingertips for that classic ciabatta look. The final touch: a drizzle of olive oil for a golden brown crust. Enjoy the process of creating these delectable homemade ciabatta rolls!
Achieving the Perfect Shape
To achieve the perfect shape for your ciabatta dinner rolls, focus on creating uniformity in size and shape. After dividing the dough, gently shape each portion into a rough ball shape. This process helps maintain the airy texture of the rolls. Avoid excessive handling to preserve the gluten structure and prevent the dough from becoming too dense. Lightly flour your hands to prevent sticking and use a gentle touch to shape the rolls. Remember, they don’t need to be perfectly symmetrical; the rustic, uneven shape is part of the charm.
Tips for Consistent Size and Texture
To ensure your ciabatta dinner rolls come out uniform in size and texture, here are some helpful tips. When shaping the dough, try using a kitchen scale to measure equal portions for a professional look. Another trick is to keep your hands slightly wet when handling the sticky dough; this prevents it from sticking to your skin. Additionally, maintaining a consistent thickness while shaping will result in rolls that bake evenly. By following these simple but effective tips, you’ll be well on your way to producing perfectly sized and textured ciabatta dinner rolls every time.
Baking Your Ciabatta Rolls to Perfection
To achieve irresistible ciabatta dinner rolls, preheat your oven and place the rolls on a parchment paper-lined baking sheet. A hot oven helps create a golden brown crust, so bake at a high temperature. Keep an eye on them to ensure they are baked to perfection – a beautiful open crumb and airy texture are signs of success. When they are done, let the aroma of freshly baked bread fill your kitchen. This simple step will elevate your meal and leave your guests craving more. Enjoy these homemade ciabatta rolls warm with a drizzle of olive oil or as a side to your favourite dish.
Oven Settings and Baking Duration
Preheat your oven to 450°F and set it to bake – ciabatta dinner rolls love the heat! Place the rolls inside on a baking sheet lined with parchment paper. Bake for around 18-22 minutes until they turn a lovely golden brown. The aroma will fill your kitchen, and your taste buds will already be excited. Keep an eye on them; you want that perfect crisp exterior. Once done, let them cool a bit before indulging in these warm, flavorful treats. Your guests will be impressed by your baking skills! Enjoy your freshly baked ciabatta dinner rolls.
How to Tell When They’re Done
To determine if your ciabatta dinner rolls are ready, look for a golden-brown crust that hints at a crispy texture. Tap the bottom of a roll – it should sound hollow. Timing is crucial; about 18-22 minutes at the right oven temperature will do the trick. Don’t rely solely on colour; the sound and feel are equally important. Overbaking can result in a tough crust, so trust your instincts. Once you nail the perfect bake, enjoy the aroma of fresh bread and revel in your baking success.
Serving Suggestions for Ciabatta Dinner Rolls
Pair your freshly baked ciabatta dinner rolls with a flavorful homemade soup or a classic Caprese salad for a delightful meal. These rolls also make a perfect side for pasta dishes or as a base for tasty sandwiches. For a cosy evening, serve them warm with a spread of butter and garlic for a comforting treat. Hosting a gathering? Create a DIY bruschetta station with various toppings for a fun and interactive appetizer. The versatility of ciabatta rolls allows you to get creative with your serving ideas and impress your guests with a touch of homemade goodness.
Pairing with Meals
When it comes to pairing ciabatta dinner rolls with meals, the options are endless. These versatile rolls can complement various dishes, from hearty soups to fresh salads. For a classic Italian touch, serve them alongside a plate of spaghetti aglio e olio or a flavorful Caprese salad. If you’re hosting a brunch, consider pairing ciabatta rolls with smoked salmon, cream cheese, and a colourful assortment of fresh veggies. The airy texture and slight chewiness of ciabatta rolls make them a perfect match for both light and rich flavours. Get creative with your pairings and impress your guests with this delightful bread choice.
Creative Serving Ideas
Transform your ciabatta dinner rolls into delectable appetizers by slicing them horizontally and toasting them lightly. Top with fresh tomatoes, basil, and a drizzle of balsamic glaze for a delightful bruschetta variation. For a savoury twist, cut the rolls into cubes, toss them with garlic-infused olive oil, and bake until crispy to create irresistible croutons for salads or soups. Elevate your brunch game by using sliced ciabatta rolls as a base for eggs Benedict or avocado toast. Thinking beyond traditional bread offerings can add flair and excitement to your dining experience.
Storing and Reheating Leftover Ciabatta Rolls
When it comes to storing and reheating leftover ciabatta rolls, it’s essential to maintain their freshness and flavour. To store them, wrap the rolls in a clean kitchen towel or place them in a paper bag for a day or two. For longer storage, wrap them in plastic wrap and keep them in an airtight container at room temperature. When reheating, preheat your oven to 375°F, wrap the rolls in foil, and warm them for about 10 minutes. Another option is to wrap the rolls in a damp towel and microwave them for a quick heat-up. Enjoy your delicious ciabatta rolls again with these simple tips!
Best Practices for Storage
To maintain the freshness of your homemade ciabatta rolls, store them in an airtight container or a resealable plastic bag at room temperature. Avoid refrigeration as it can make the rolls stale quicker. If you anticipate not consuming them within a few days, consider freezing them. Simply wrap the rolls tightly in plastic wrap or aluminium foil before placing them in a freezer-safe bag. When you’re ready to enjoy them, let the rolls thaw at room temperature or reheat them in the oven for a freshly baked taste.
Reheating Without Losing Quality
To reheat your delicious ciabatta dinner rolls without sacrificing their quality, preheat your oven to 350°F. Wrap the rolls in foil to prevent them from drying out. Place them on a baking sheet and warm them for about 10 minutes, ensuring they are heated through. Another method is to sprinkle the rolls with water before placing them in a preheated oven for a few minutes, allowing the steam to revive their crust. These simple techniques will help you enjoy your leftover ciabatta rolls just as freshly baked, maintaining their delightful texture and flavour. Enjoy your warm and tasty rolls with any meal!
In conclusion, these quick and delicious Ciabatta Dinner Rolls are a delightful addition to any meal. With their Italian roots and perfect texture, they are sure to impress your family and guests. The secret lies in the careful steps of mixing, fermenting, shaping, and baking. Whether paired with a hearty stew or enjoyed on their own, these rolls are a true delight. Don’t forget to store any leftovers properly for future enjoyment. Embrace the joy of baking and share these delicious rolls with your loved ones!
Frequently Asked Questions
Can I Use Whole Wheat Flour?
Yes, whole wheat flour can be used in place of regular flour for a healthier twist on ciabatta dinner rolls. It adds a nutty flavor and extra nutrients to the bread. Experiment with ratios for desired texture and taste.
How Can I Make My Ciabatta Rolls Crispier?
To make your ciabatta rolls crispier, try baking them at a higher temperature for a shorter time. Brushing the rolls with olive oil before baking can also enhance their crispiness. Additionally, placing a pan of water in the oven while baking can create steam for a crispy crust.
Can I Freeze Ciabatta Dinner Rolls?
Freezing ciabatta dinner rolls is a great way to extend their freshness. Once cooled, wrap the rolls tightly in plastic wrap and store them in an airtight container. To thaw, leave them at room temperature or reheat in the oven for a crispy texture.
Troubleshooting Common Ciabatta Issues
Having trouble with your ciabatta? Learn how to troubleshoot common issues like dense texture or lack of airy holes. Discover tips on adjusting hydration levels and fermentation times for perfect ciabatta rolls every time!
Are Ciabatta Rolls Suitable for Vegans?
Ciabatta rolls are typically suitable for vegans as they usually consist of basic vegan ingredients like flour, yeast, water, and salt. However, it’s always advisable to check the specific recipe or source of the ciabatta rolls to ensure they align with vegan dietary preferences.
How to Adapt This Recipe for a Bread Machine
To adapt this recipe for a bread machine, simply follow the manufacturer’s instructions for dough settings. Let the machine handle the kneading and rising. Once done, shape the rolls and proceed with baking as usual. Enjoy effortless Ciabatta Dinner Rolls!
Try Another Recipe
Easy Ciabatta Dinner Rolls
Ingredients
- For the Biga
- 100 ml Water
- 100 g Bread Flour
- ¼ Teaspoon Yeast
- For the Dough
- 175 g Bread Flour
- 120 ml Water
- ½ Teaspoon Yeast
- 1 Teaspoon Salt
- 1 tbsp extra virgin olive oil
Instructions
- Make the biga by mixing the water, bread flour and yeast until fully incorporated and creamy. Cover the mixture with cling film and leave at room temperature for at least 12 hours and up to 20.
- When ready to make the dough, place the bubbly biga mixture into the bowl of a stand mixer, along with the remaining bread flour, water, and yeast and olive oil
- Mix on medium speed using beater to incorporate the ingredients togethor (I find beater works better and quicker). Switch out to the dough attachment, scraping down the sides of the bowl when needed until fully incorporated and the dough becomes elastic and pulls away from the sides of the bowl (around 10 minutes).
- Place dough into well oiled bowl and cover with cling film until 1.5 times the size (around 1 hour)
- Once risen, fold the dough over itself (around 7 or 8 folds)
- Let rise till 1.5 times the size, then perform folds again. and let rise
- While dough rests, preheat oven at maximum heat, placing an empty baking tray or oven-safe frying pan on the bottom of the oven.
- Remove the dough onto well-floured tea towel and using a dough scraper, manipulate the dough into a long ‘slipper’ shape and portion into rolls. Rest for 20 minutes.
- When ready to bake, place on a baking tray
- Add ice cubes to the frying pan in the oven to generate some steam before adding the loaf to bake ( the ice cubes will help to generate steam and result in a crispy crust)
- Bake for 20 minutes, removing the rolls when browned and sounds hollow when tapped gently.
- Leave to cool on wire rack then slice
Notes
- The dough is wet and sticky and can be tricky to shape – use a bench scraper.
- The volume of water specified is exact. Measure using a digital scale to ensure you use the correct amounts.

Hi, I’m Paul! I’m a passionate home chef, recipe developer, and food lover who believes that cooking should be fun, rewarding, and stress-free! Through Scoffs & Feasts, I share my favorite tried-and-tested recipes, cooking tips, and troubleshooting advice to help home cooks gain confidence in the kitchen. Whether you’re a beginner or an experienced foodie, I hope my recipes inspire you to try something new.